VW T4 Forum - VW T5 Forum banner

School bus / day van build thread

9.2K views 31 replies 8 participants last post by  T5White  
#1 ·
Well here we go! Feel very under-qualified to be doing this, never mind publishing the proceeds, but I have got so many ideas and learned so much from this forum that I thought it only right to document my own T:.

Got going with a bit of a false start unfortunately. Found a T5.1 with air con at a reasonable price, borrowed my mum's car and set off for York to make the deal. Poked it a bit, kicked the wheels, frowned at the self tappers, razzed it up the street and back, phoned the wife, and said I'd take it. Lifelong savings disappeared into the electronic ether and a week later Big Bertha was sitting on my drive :). The family were smitten and I quickly got to work lefty-loosening those damn self-tappers and stripping out the ply. It was then that horror struck :eek:. Hidden under the ply was a hole in the body work as if a mighty mouse had torn his way through the inner skin. Turning to the forum for advice this seemed most likely to to be the left overs from a repair by a ham-fisted back street panel beater :(. Somewhat deflated by this I phoned the dealer. It felt like I was phoning the breeder of a new puppy. I new something was wrong with it but it was already part of the family, and I sort of loved it anyway. In fairness the breeder, ahem.. dealer, was very helpful and to make a short story long I ended up with a new van. It even has electric windows and mirrors which the old one didn't. And lower mileage. Strangely though, I just don't feel the same about it as I did Big Bertha. I don't know its reg. and it doesn't have a name. It is known by the family just as 'The Van'. Poor van. I don't even have a picture of it. But I am sure we will grow to love it in time.....
 
#2 ·
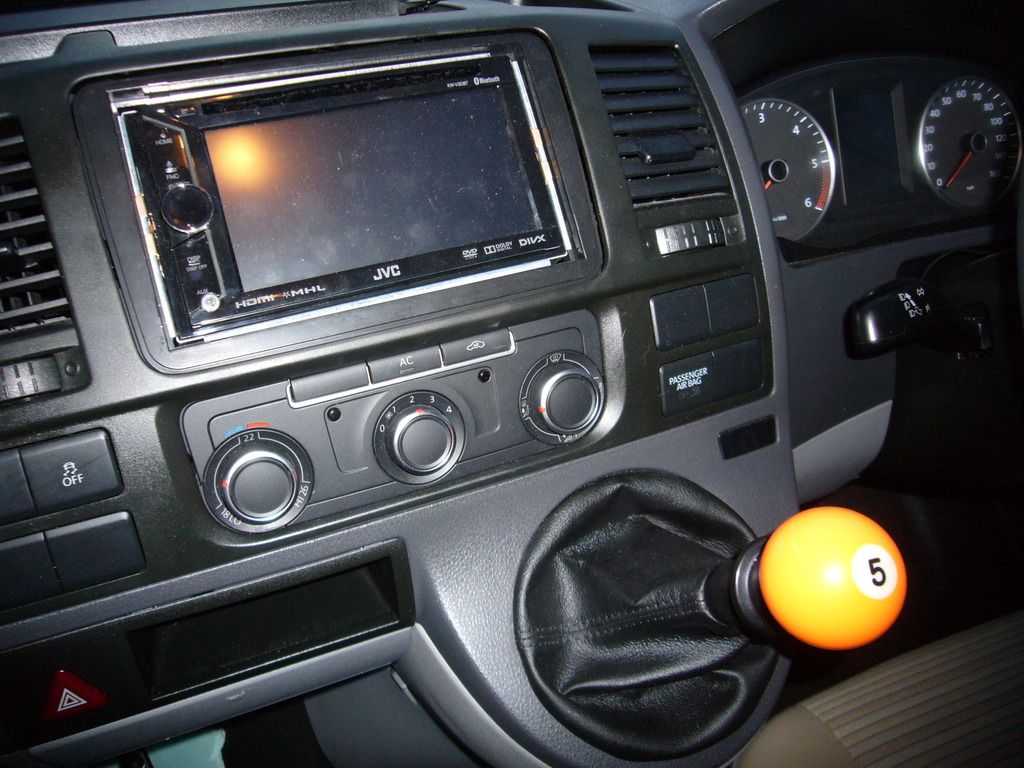
So as the title says this van is going to be a school bus for the bairns, day van for dog walks and a light camper for getting away from it all. Budget is tight so got to prioritise. First things first then I NEED a pool cue gear knob....


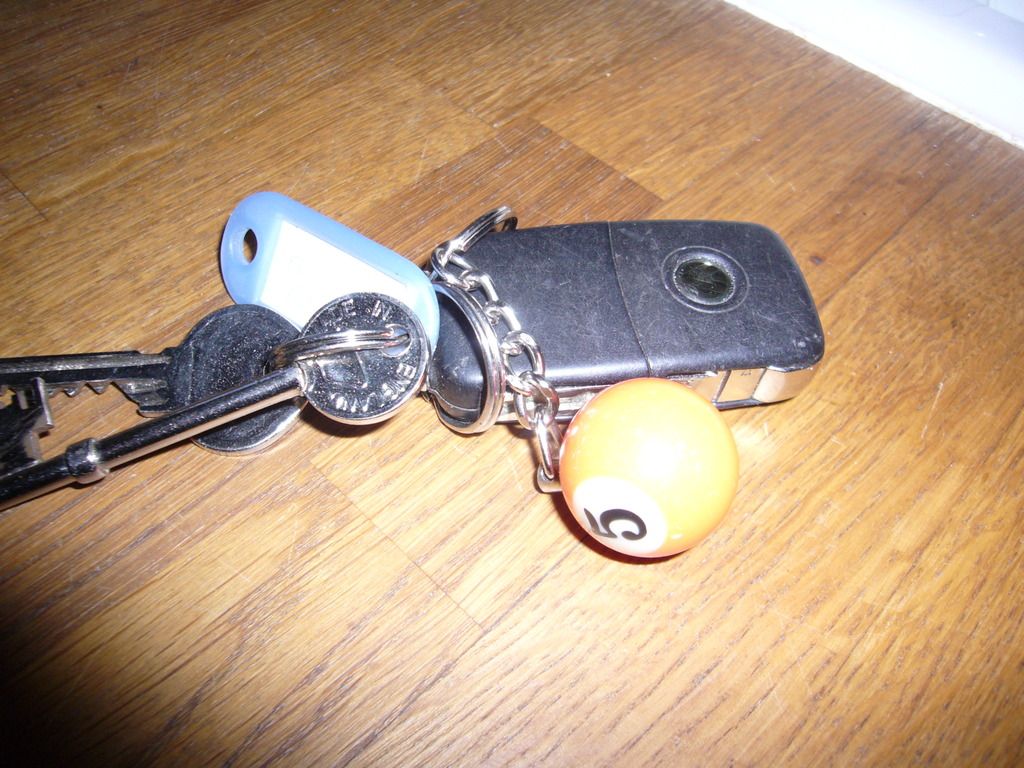
I just love that. So I got a matching keyring....


T:

Next up... the sound system!
 
#4 ·
You did indeed, well spotted! What an amazing transformation Dean + the team made. So glad I got them to do the windows rather than buggering about with it myself. Yours is looking great - I never saw the finished article. Did you make the one piece roof section yourself? I like the cab headliner carpeted too. Something else for the list! So how was the inaugural camp at the race when you got away from Dean's?
 
#14 ·
Thanks. They do a good job. Am pleased i got them to do mine. I did make the one piece headliner. With help from my dad. I think it looks better. More so with the cab headliner carpeted.

It went well thanks. Once we got there. A14 was closed in 2 places. Diversion routes had roadworks on them. Had to go through Cambridge. Students and bikes! Nightmare. But the weekend was good. Cold and windy but the van was much better than a tent!!.

Keep up the good work with the van.

:ILU:
 
#5 ·
So onto the sound system. Not really much but wanted speakers in the back to drown out the kids, a reversing camera to stop the crunching noise and a 'dual zone' facility to play dvds on the hypothetical flip down monitor in the back while chilling out to some hardcore thrash jazz in the front :ILU:.

Word on the forum suggests Panasonic or Kenwood make the thinking mans head unit. So I got a JVC. Has facilities for all of the above, was a new model and a fraction of the price. Could have gone cheaper on lightinthebox but for some reason was compelled to get a brand name. Installation was simple with a plug 'n' play canbus adapter and you can see it not working in the knobbly picture above. Most confusing part was the mythical blue wire. Really shook up my shakra. Apparently the T5 has a powered aerial (you all know this don't you) so you need to feed that via the blue wire of the FAKRA adapter. Just so happened that the can bus adapter had a switched live blue wire with an empty socket so I plugged in the ISO connector and hoped for the best. The radio works so I guess that is the best that can be hoped for :cool:.

Got myself some panasonic 2-ways for the back and an epic length of speaker cable. 2 sizes of ISO connector later and the cable is in but the speakers sound pants. I am hoping that is just because they are not installed yet as I tested them while holding in my hands :*. Hoping for some more meaty bass when installed properly. Can you pack behind them with insulation or best to leave space?
 
#6 ·
Quick review of the JVC KW-V30.

It is OK. Although a new model the GUI is not great. The touch screen functions well enough but is a bit old-skool in comparison to a modern smart phone. Most annoyingly the dual zone function is not that great. You can play DVDs to a separate output but not videos from a USB stick. It does the job and I have no idea if the Panasonics and Kenwoods are any better but given the limitations of the dual zone I kinda wish I had gone for one of them.
 
#8 ·
Reversing camera.

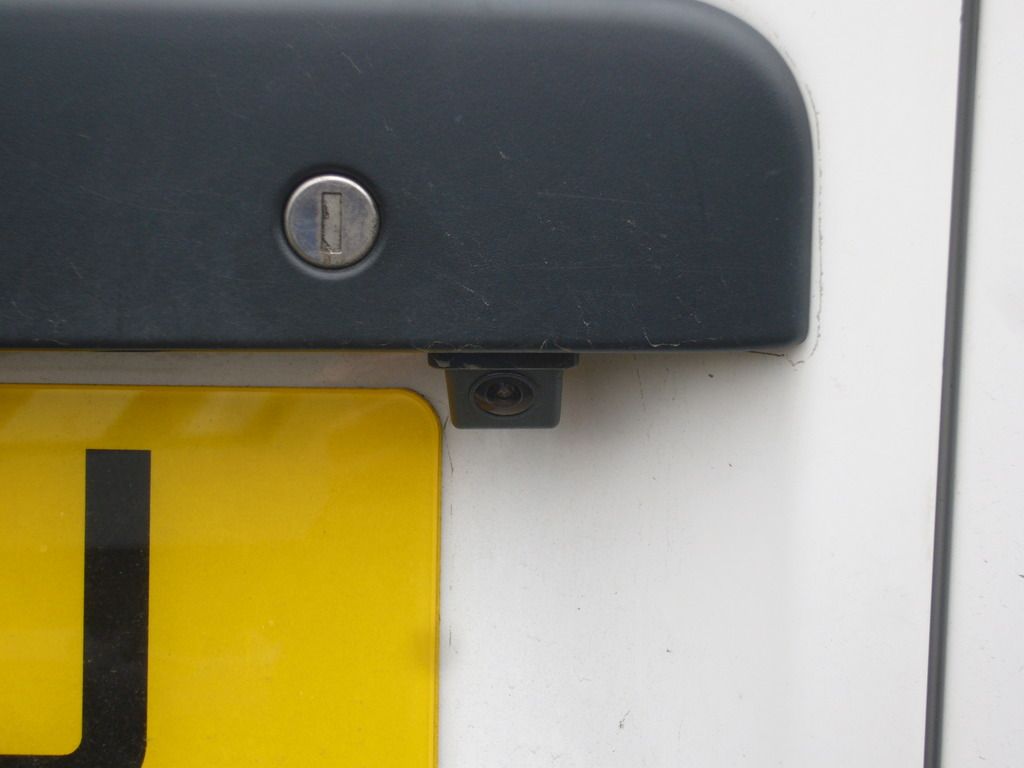
Initially got one of the adjustable ball-in-socket type ones from e-bay. However, it was impossible to adjust and keep pointing in the right direction so back to the bay it went. Got another which looked a bit better and this time had an allen bolt to hold it in position. Still not happy with it though as in order for the camera to be pointing far enough backwards the wire must be squashed up against the housing. In addition it was impossible to get pointing in the right direction anyway. So I gave up and got a fixed one and it is perfect. An absolute doddle to fit and shows you what you want to see. Well, most of it. Covers about 3/4 the width of the van. So unless you are an idiot you should still use your mirrors or you will end up reversing into your own trailer on your own driveway :eek:. Hypothetically speaking, of course :cool:.
 
#10 ·
Fitting the reversing camera on barn doors....

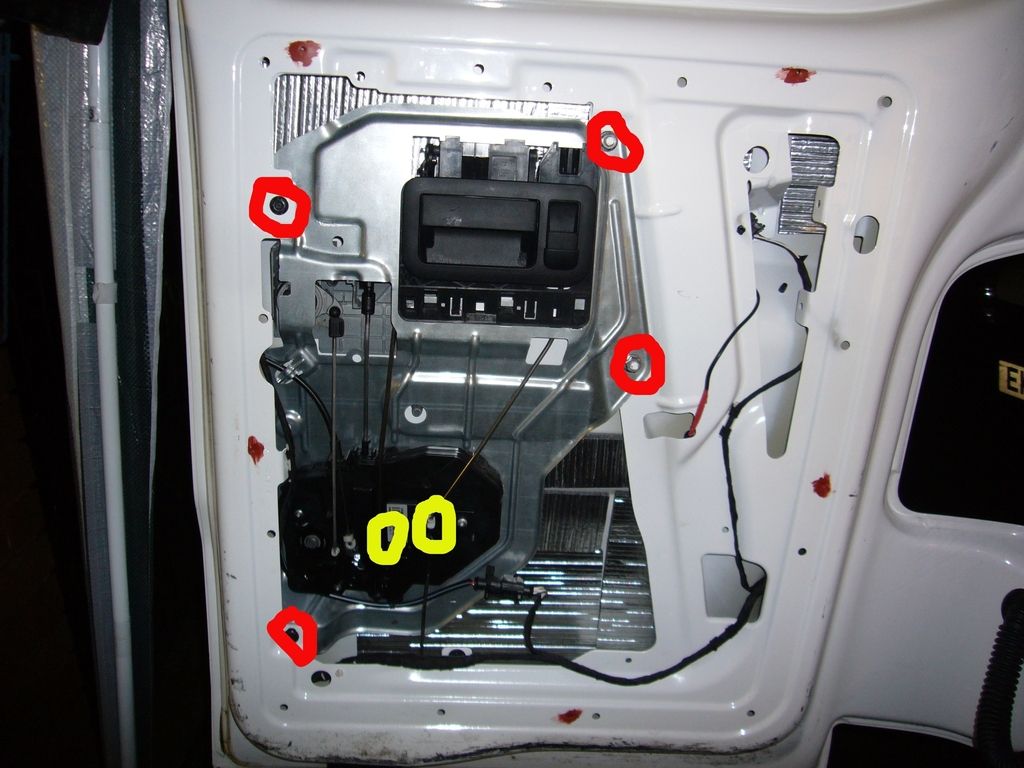
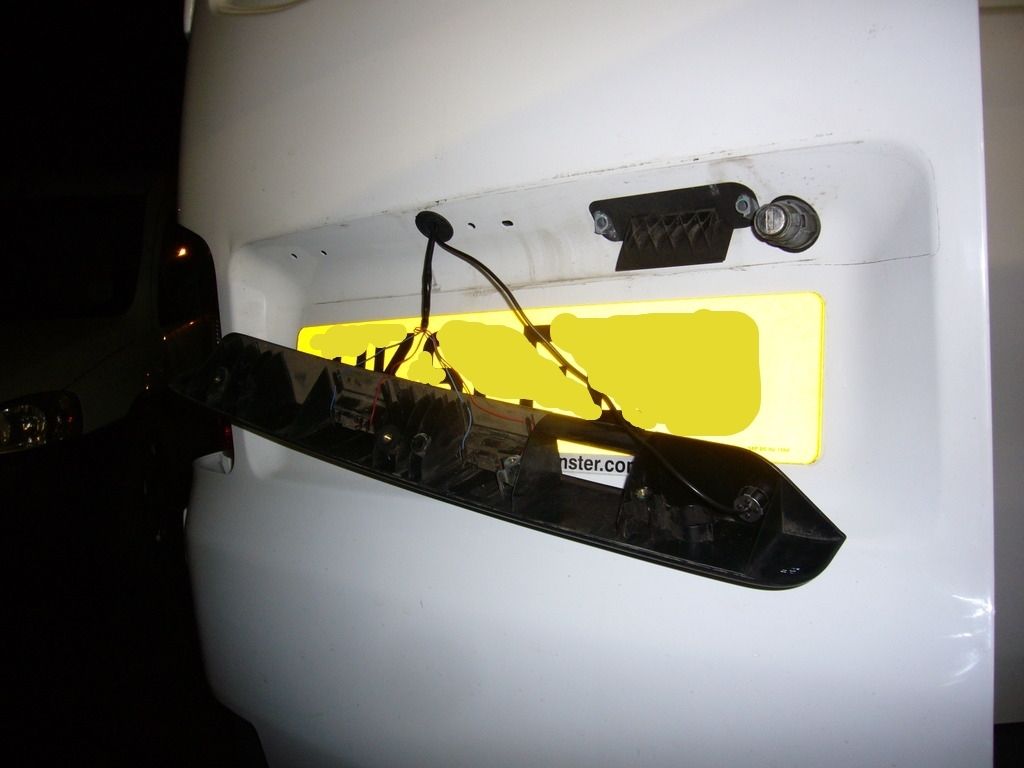
First you need to loosen the rear door locking mechanism. Loosen the bolts marked in red then take out the connecting rods marked in yellow. The rod on the right just pops out, the one on the left you have to prise open the plastic clip. Mark the rod before you take it out though so you can put it back in the same position. Once this is done you can jiggle the handle assembly up and out.


You can then undo the bolts (from the inside) that hold up the plastic strip above the number plate. This then comes away.


Drill a hole to the midline of where the lock barrel sits and install the camera.

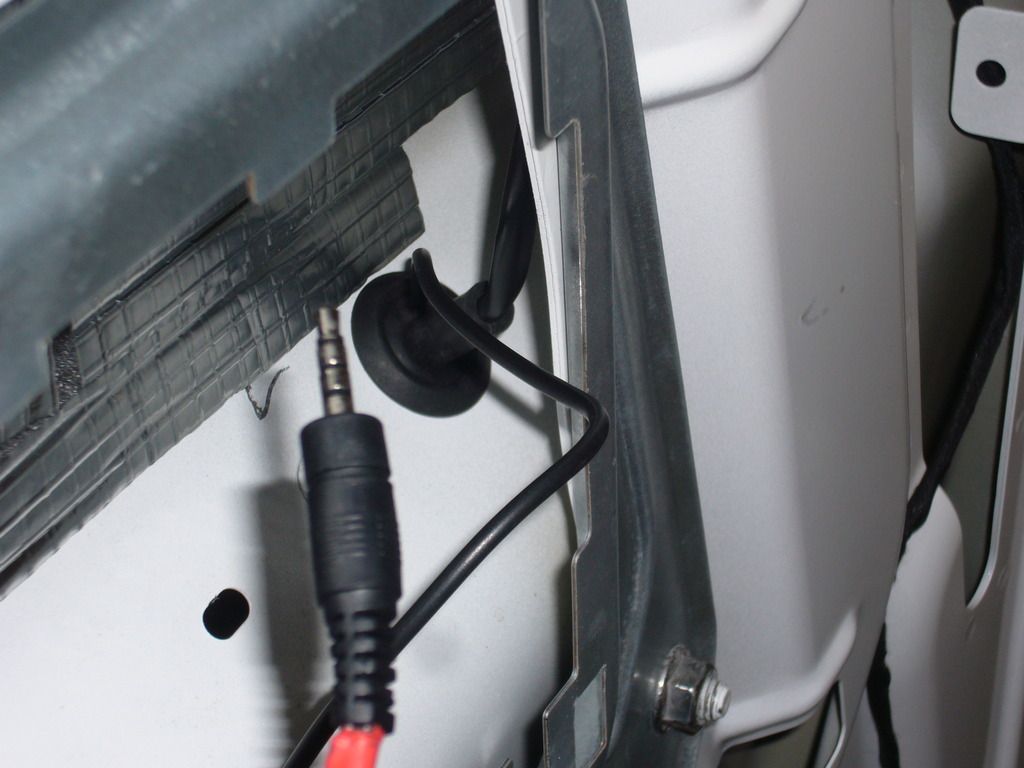
There is a rubber grommet that the number plate light wires enter the van. Make the hole a bit bigger and put your reversing camera wire through here. By luck rather than judgement my camera lead had a single male connector rather than two females. This slipped through the grommet with ease.....


and then it's just a question of connecting it up. Disconnect the rubber conduit from van to door and feed wires through using a coat hanger or one of these..

http://www.toolstation.com/shop/Hand+Tools/d10/Electricians+Tools/sd170/Draw+Tape+Nylon/p35379

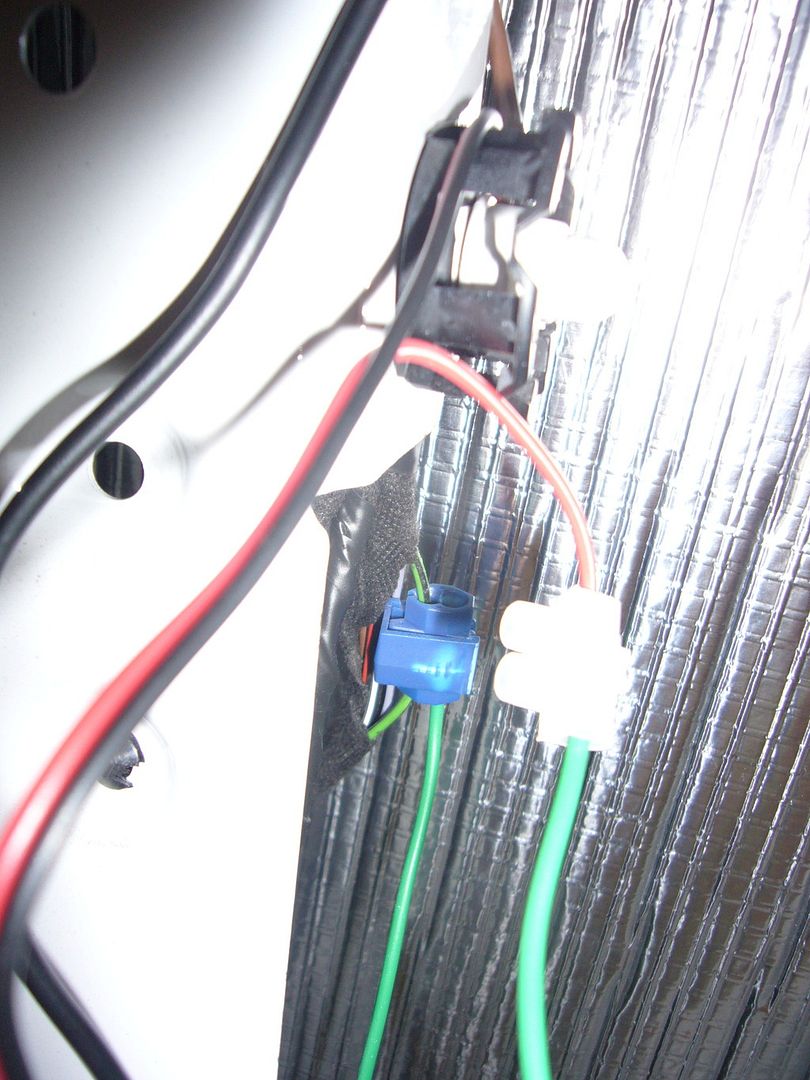
Unravel the wires at the back pillar and locate the green and black switched live to the reversing light. Splice into this for your live feed and use the adjacent earthing point for negative. I was lucky in that the video/RCA cable had a flying lead at each end to use for the reversing switch. If yours doesn't have this you can tap into the green and black wire further forward and run a separate cable down the A-pillar. Don't just tap into any old green/black though as I think there are a few! I think the one you want travels under the cab mat and up the B-pillar before heading to the rear.


So then its just a question of plugging the RCA and switch lead into your head unit and Bob's your uncle.
 
#15 ·
Out with the bulkhead.

Hands up who would like VW to just bolt on the lower bulkhead? What a royal PITA. Should we start a petition? Or is removing the bulkhead a right of passage to being a true VW camperman? I guess you can always tell who did their own conversion vs who paid someone else to do it by raising an eyebrow and simply saying 'bulkhead'? If the response is a deep sigh and a knowing glance then you know you are in good company.

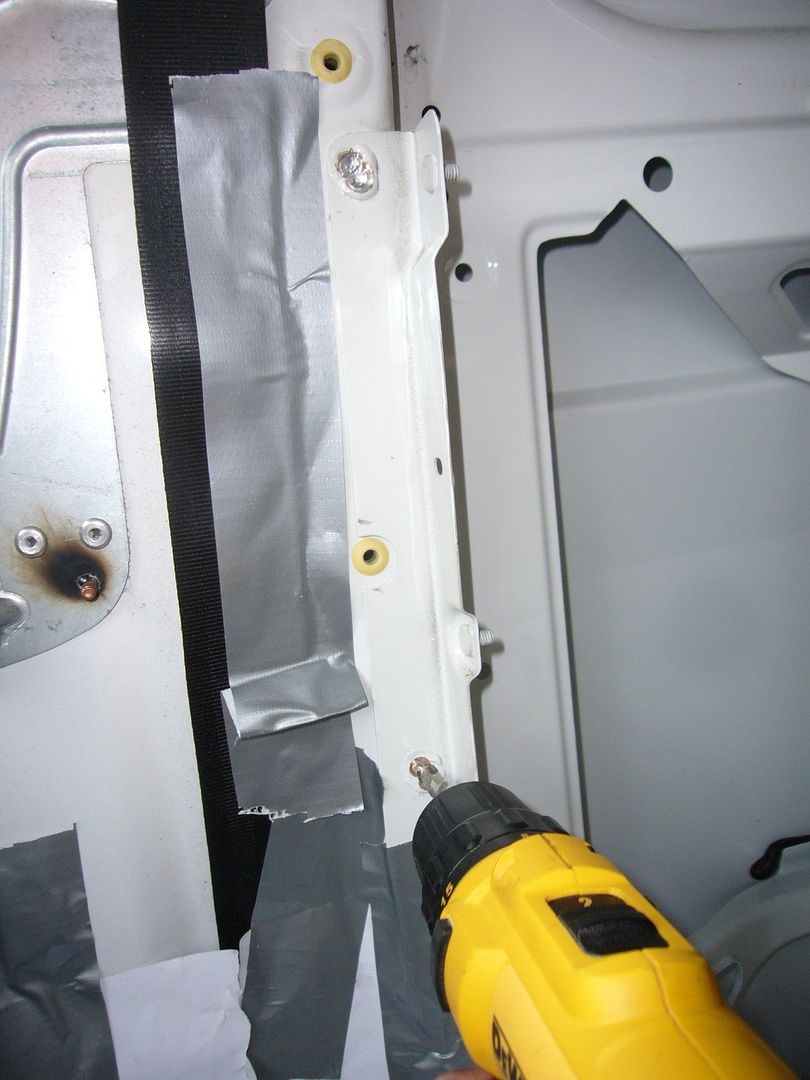
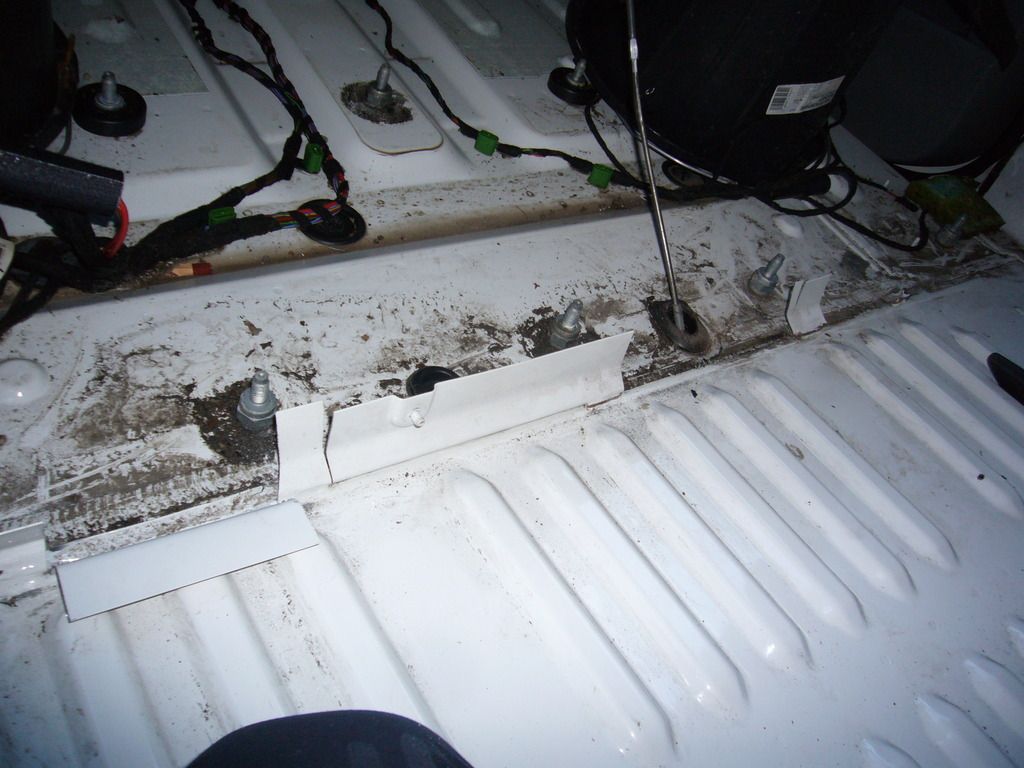
Anyway, there seems to be a number of ways to skin this particular tabby. I didn't fancy the idea of an angle grinder in my van. All those sparks and the possibility of slipping and taking out the handbrake cable. Or my hand. Also couldn't be bothered protecting all the paint work as some do so diligently. So it was the elbow grease method for me. First off, spot weld drill. Slow and steady wins this particular race. Keep your speed down and let it mill away the metal. Quite satisfying. Great article with more than you could ever wish to know about spot weld removal here...

http://autobodystore.com/forum/show...read.php?23694-quot-Basics-of-Basics-quot-Spot-Welds-removing-a-welded-on-panel

Most useful is #9. My drill bit was smaller than the welds so even when I drilled two holes there was often a slither remaining. Would never have crossed my mind that I could tear the metal so glad I read this first.

So my tips would be slow speed and don't drill right through. Just get down to the level of the van skin and then bearing in mind #9 from above pop it off with a flat blade screwdriver. You can see in the picture below I have drilled twice on the top weld and it just popped off after this.


Next up the lower section. First thing to bear in mind is that when you put your shiny new ply and altro down this is all going to be hidden so don't make this job harder than it needs to be. I started off using an expensive metal cutting bit on my multi-tool (I love my multi-tool) but in the end it was easier to just use a junior hacksaw. Cut down to either side of a weld and then wiggle until it comes off in your hand :D. Easy-peasy and no sparks.


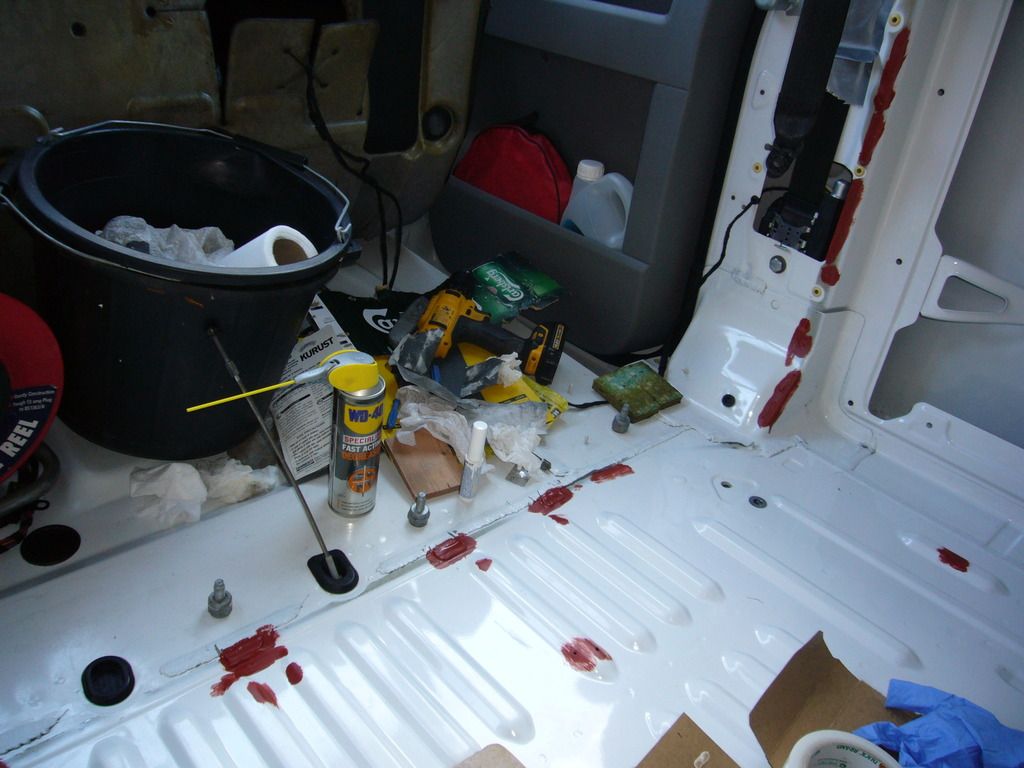
Slap on some red oxide, stand back to admire your handywork, wonder how it got so late and retire for a beer. Job done, stripes earned, initiation complete.

 
#16 ·
Self tapper holes

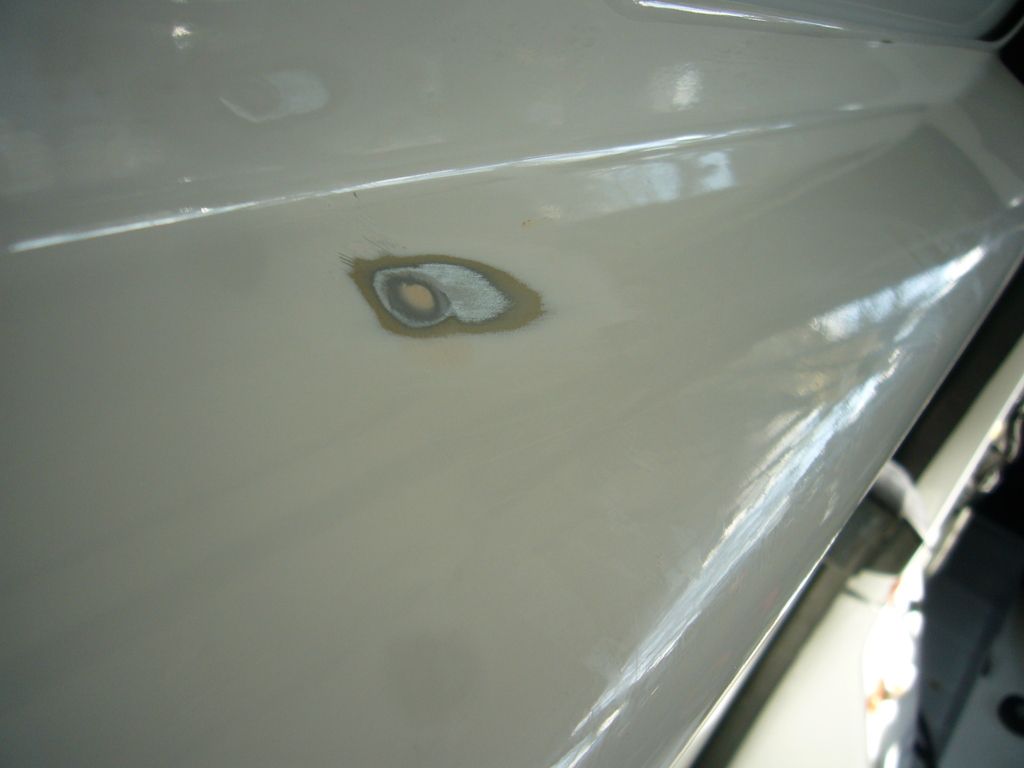
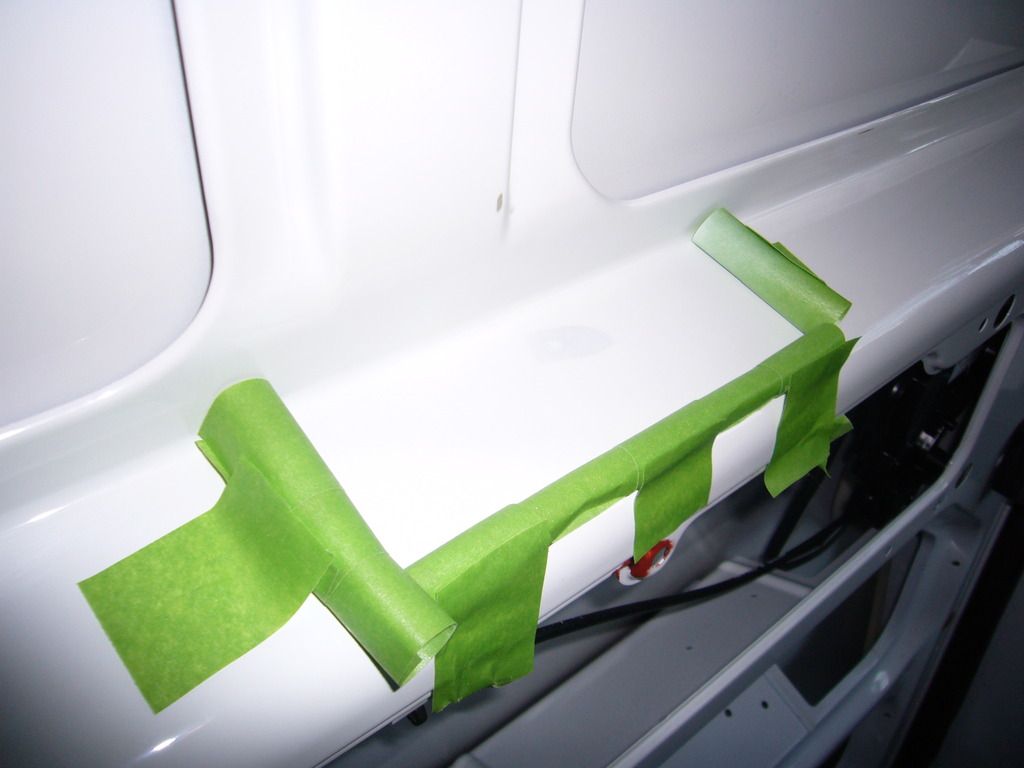
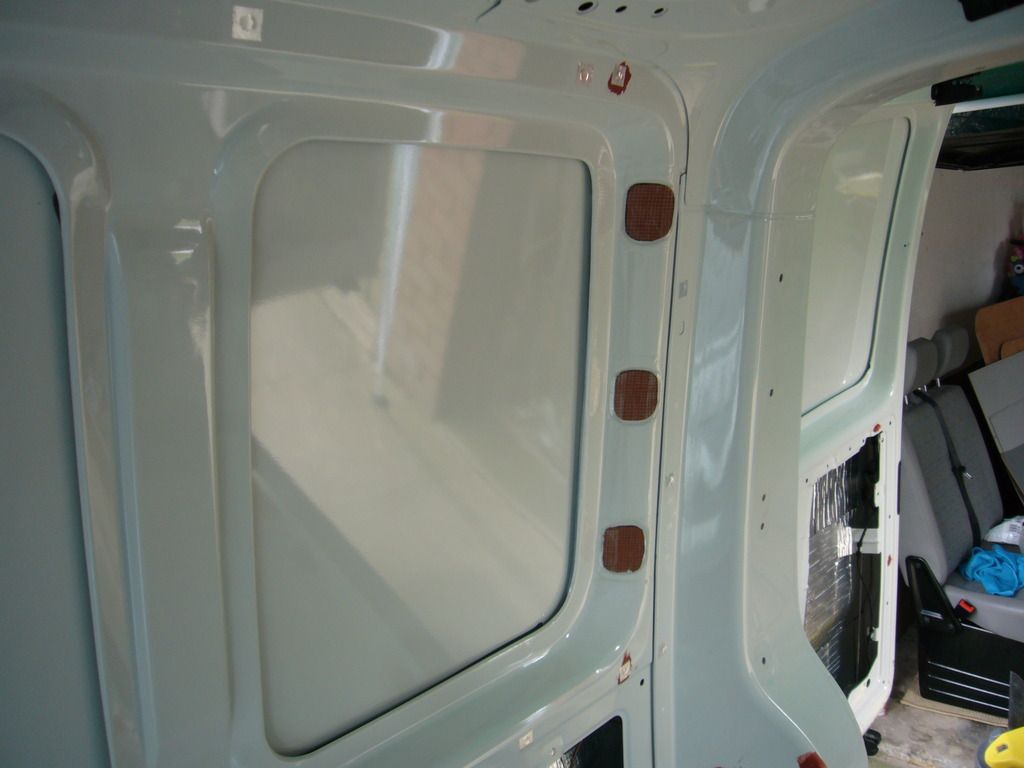
Have I mentioned the self tapper holes before? Massively irritating. The first van (Big Bertha, bless her) looked like she had been used to deliver Kalashnikovs with broken safety catches down a bumpy road. Fortunately this van is not so bad. Holes in the floor were countersunk or filed, primed with red oxide and sikaflexed. The ones on the sliding and barn doors were a bit more problematic. Firstly I filed down the rough bits. Then they got filled with Isopon P38. Great stuff, just like polyfiller. Found the paint code to be candy white so was delighted to find it lurking on the shelves at the local Halfords. Sanded down with some randomly chosen wet and dry, then applied primer and top coat. Was feeling really chuffed with myself at this point. Having never done any bodywork before I was expecting it to look pretty rough but things were coming along nicely. Came back to put on a second coat and what a disappointment. Halfords VW Candy White bore no resemblance to the white of my van :eek:. Far too creamy. Damn it :(. Van was heading down south the next day to get seats and windows fitted which was why I wanted this job done first. Will have to get sorted at a later date though. Guess I'll have to get some paint made up? At least it looks better than it did before and I learned a bit along the way. Best tip I picked up was to roll up a length of masking tape to surround the area to be painted rather than sticking it on flat. This creates a gradient to the edge of the sprayed area and it blends in better than a straight line which would leave an edge.


#17 ·
Insulation.

Used thermoliner for insulation. Nothing else. Van going to be fully glazed so don't see the point in overdoing it and prefer the idea of air circulation behind the panels than stuffing it full of recycled bottles. Might be wrong but I can always go back and shove some in later. Chose thermoliner as it is supposed to provide some sound insulation as well as thermal. Asked the seller if I should put some silentcoat or whatever on first and was told it isn't necessary. Am not convinced though. This stuff is so light it is not going to deaden any panel vibrations. Still, won't notice anyway with AC/DC turned up to 11 :ILU:!

Was not sure about how best to deal with the bigger holes before lining, especially the ones behind the back window panels. Asked on here and advice was that foil tape is perfectly adequate and if not can always put a small carpeted panel over the top once lined. I didn't have any foil tape though so got out the gaffer and stuck some bits of plastic plant pot over the holes. Next morning the tape was unsticking due to the curve so I re-stuck with sikaflex. Here is a photo of the plant pots. Can't find a later picture but I did get some foil tape and used that for the smaller holes and the bigger holes above the barn doors where I put a couple of layers. Having done all of this I can say that there is no need to do any more than foil tape. A couple of layers over the bigger holes and once the lining is on it is pretty sturdy. Much better than gaffer tape for this job.

 
#18 ·
Lining

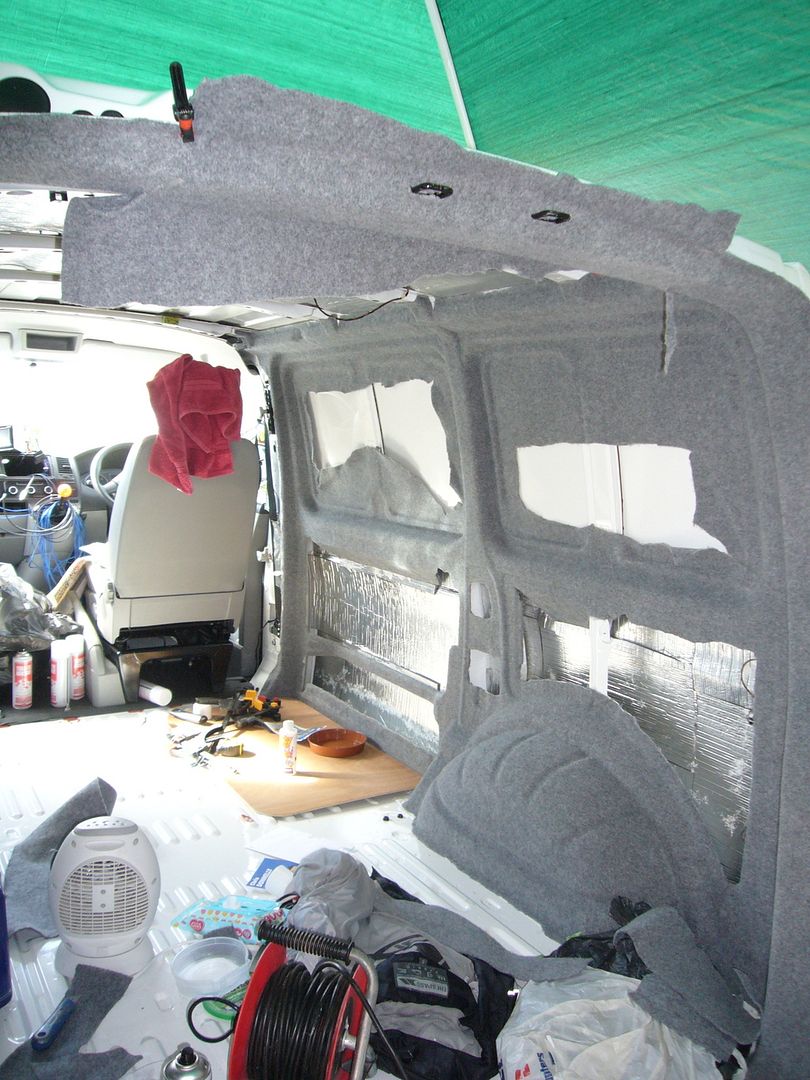
Lining - boy was this harder than I thought it would be! Having read through various accounts on here it sounded like lining the van would be a doddle. Perhaps it was because I did it in the cold (well, this is Scotland) so the carpet was not very pliable or perhaps I am just a ham-fisted buffoon but I found it very awkward. Being somewhat follicularly challenged I will confess to not really knowing my way around a hair dryer. But I thought it would be safer than my heat gun so sneaked through the house, pretended to go to the toilet and sloped back to the garage with the wife's Babyliss Mega Turbo PRO. Seriously, google it. Sounds more like a Power Ranger's special move than something to style your coiffure but little was I to know the power this thing packed. First off I scorched the lining. Secondly I burnt my fingernails :eek:. Seriously. Can you think of anything more painful? Pushing the lining into a corner I was really struggling to shape it so turned the Super Mega Force nuclear reactor up to full. Could feel the heat but felt just a few more seconds and I'd have it. Its only a hair dryer after all. Well I got the corner nailed but boy did I pay the price. Excruciating pain for days. To add insult to injury I had only just grown a nail back after hitting it with a saw a few months earlier. The lining looks OK in the end although I am a bit of a perfectionist and it certainly is not that. Ended up having to make a join in one corner and although nobody else will ever notice it, it will always be up there looking down on me. The main lesson is to get your carpet stuck to the most proud bits first and only then start to work it into the recesses and corners. Otherwise you will go off squint like I did and end up having to make a join. Remember, once you have started shaping the carpet there is no going back so get it lined up square and stick it to the flat bits first and even though the recesses are deep the carpet will stretch. If you have a choice though I would do it in the South of France rather than Scotland. Get some little clips from Wilkos to hold the flappy bits up and out of the way (orange and black thing top left).

 
#19 ·
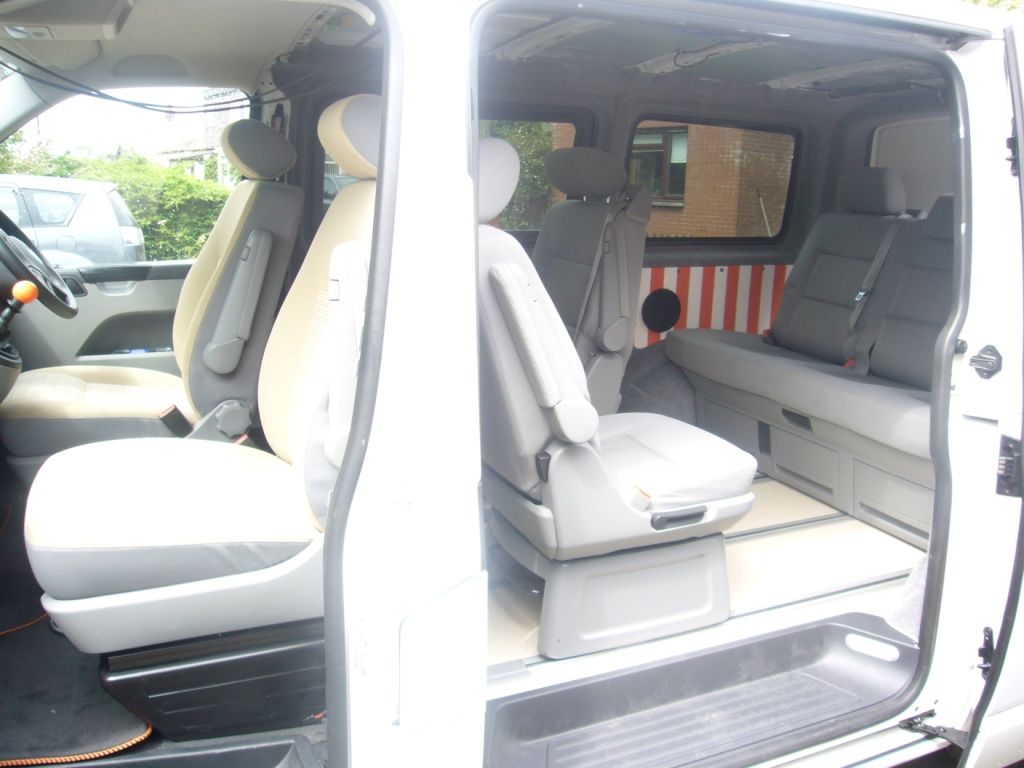
So after a rather rushed couple of days cleaning, painting and carpeting I set the alarm clock, packed up the wife and youngest bairn and headed off for the first of hopefully many road trips. First stop Liverpool-ish for some caravelle seats and rails. Had ordered a full set of dark grey anthracite duo seats but the helpful chap was not at all put out when I changed my mind at the last minute. In the end we got two-tone cream/grey California swivels for the front and light grey captains and bench for the rear. Delighted with the swivels. Good peace of mind to have official VW mechanism and they are sooo much more comfortable than the bog standard van ones :). If you are changing your seats anyway check these puppies out - well worth the extra which was only a bit more than an aftermarket swivel plate would be. Peace of mind extends to the caravelle seats too. I am sure RIBs are perfectly safe but none will be crash tested as well as the official ones and given the van will primarily be used for ferrying the kids from hither to thither they are well worth it.

Had a lovely night being spoilt rotten by my Aunty and Uncle and off again in the morning. Next stop Vandoc. As with everyone else who has used their services I can not recommend these guys enough. Had originally intended on doing the windows by myself but I am really glad I didn't. From both the ease of just getting it done, the knowledge of it being done properly and the value for money given the service provided it was a no-brainer in the end. They did a brilliant job on the van and literally went the extra mile or two by giving us a lift into town. Town was a strange experience in itself. Spent the day walking around a shopping centre with wife and buggy and going for a Wetherspoons lunch. Most time I had spent with the wife without 'a job to do' for years. Should sign on and do it more often.

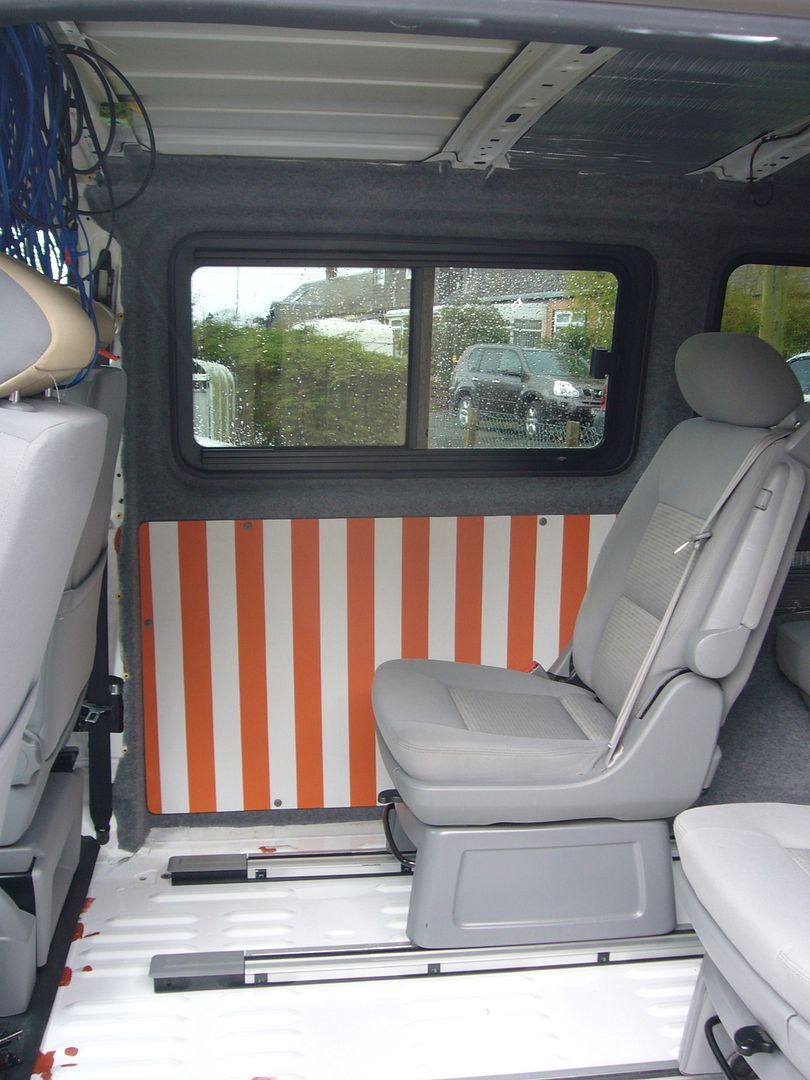
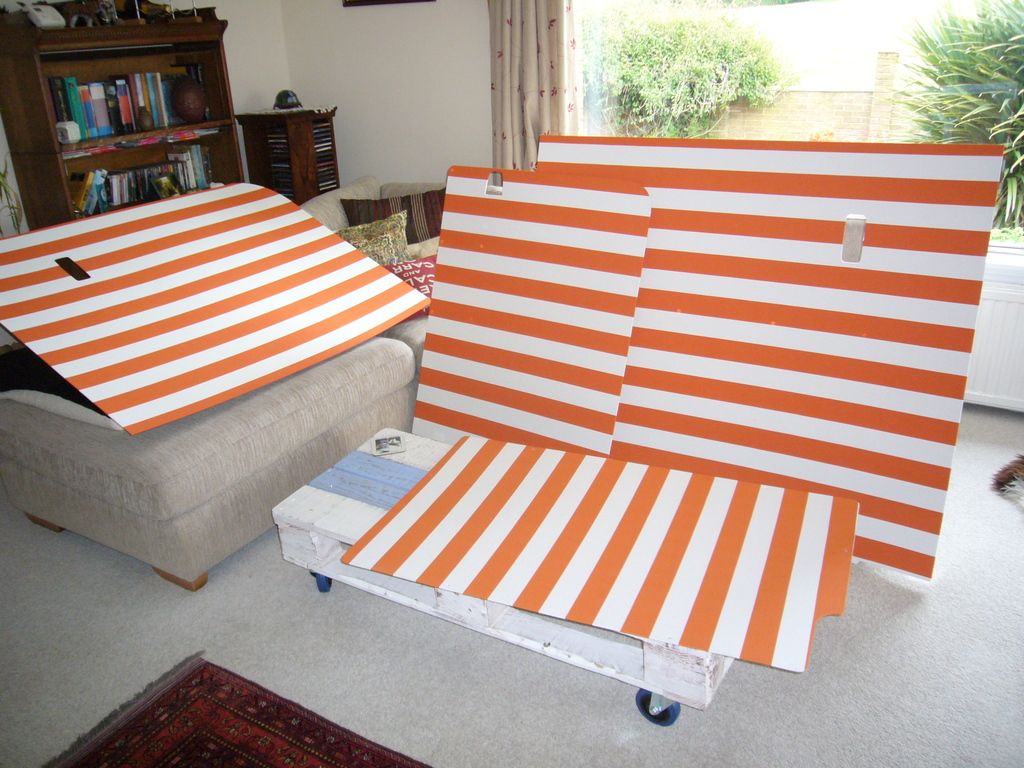
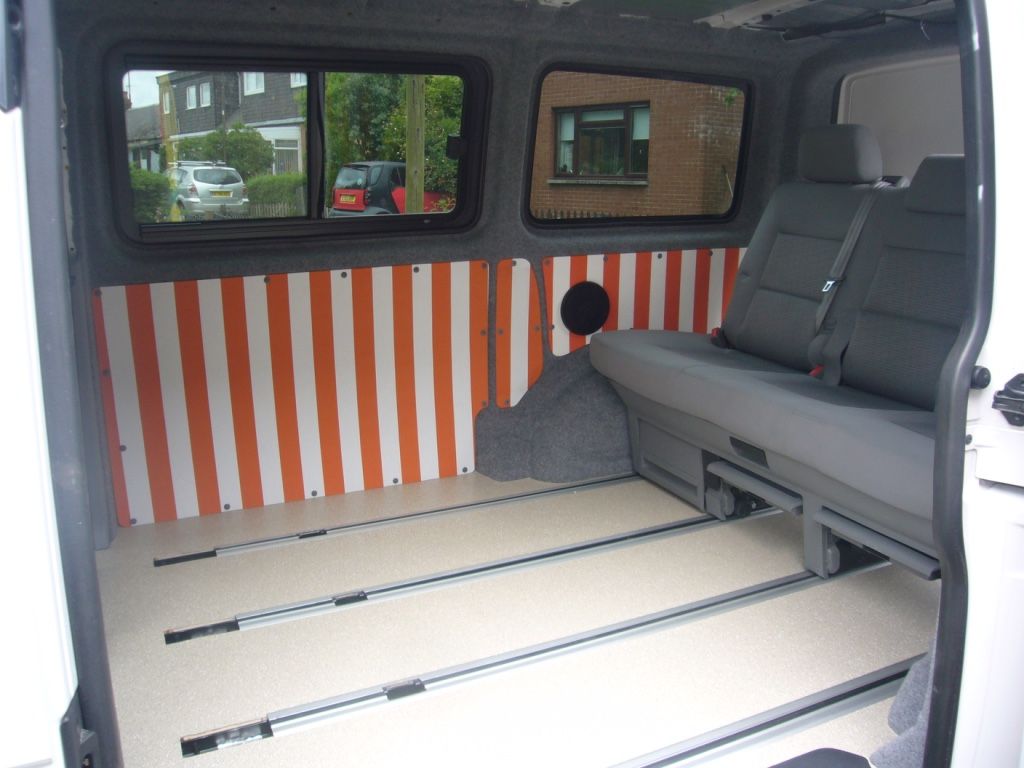
Can't find a great picture of the seats but here is a captains chair, window in the background and some experimental panel covering from Ikea.


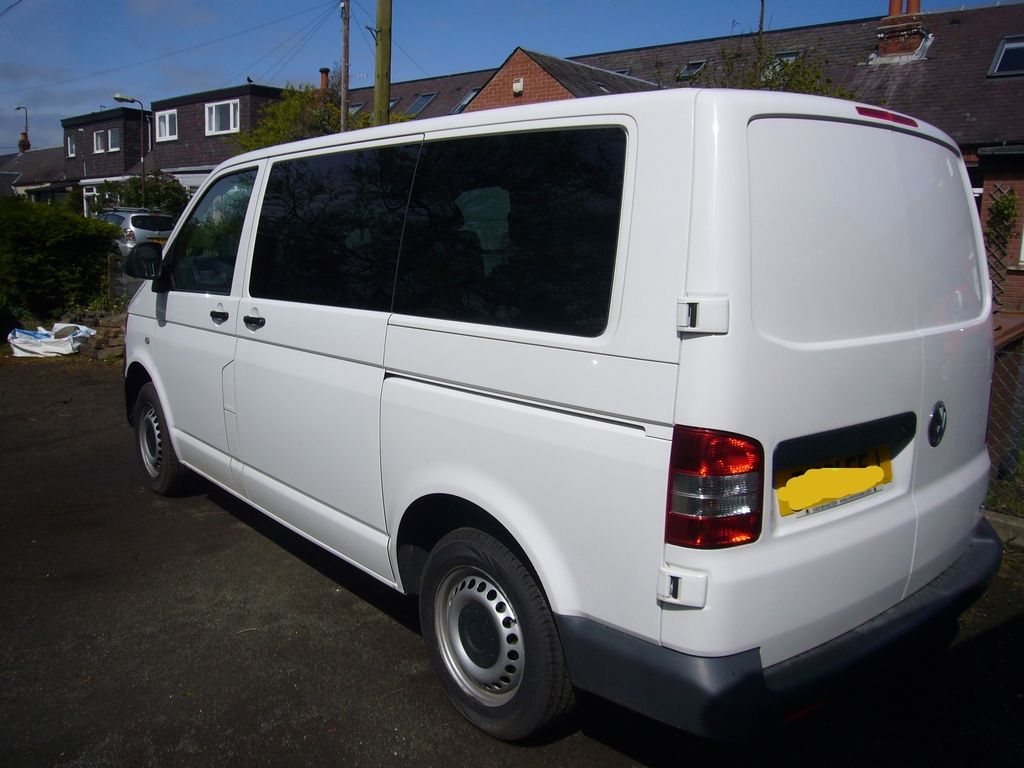
And what a difference those windows make! Having never had tinted windows before I was a bit concerned that 90% would be too dark - but none of it as they are just right. Didn't get the barn doors done at this stage but can always do it later. Actually think it looks quite good without and will provide a modicum of privacy for camping duties.


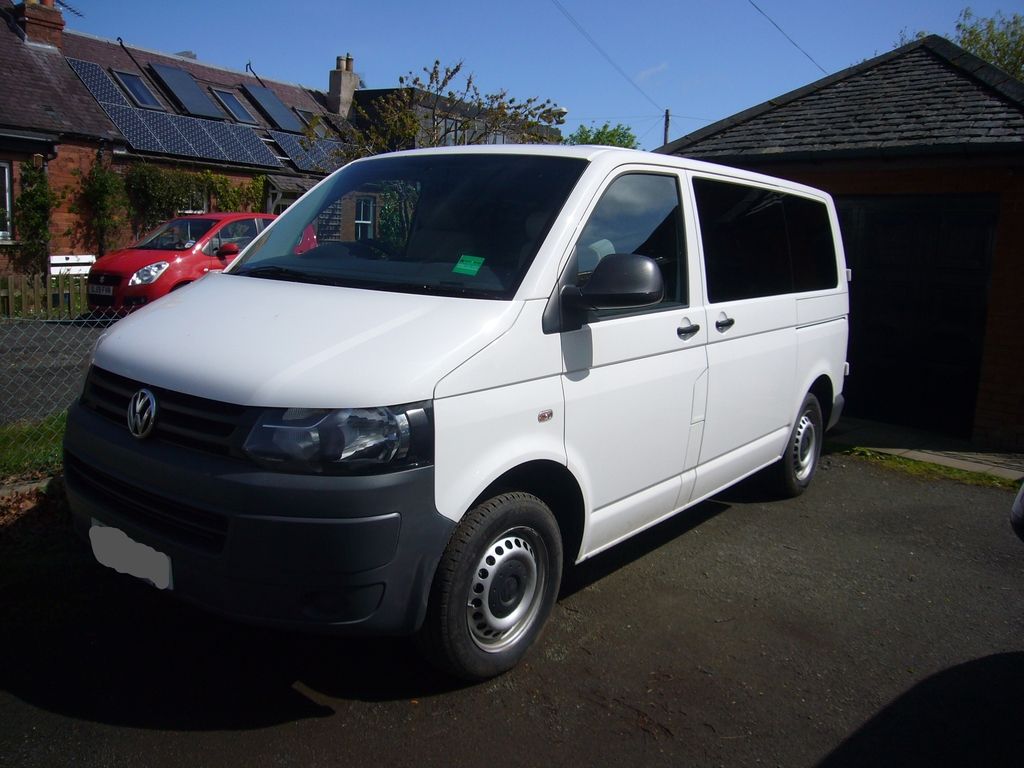
And for anyone that doesn't know what a white van with windows looks like from the front...

 
#21 ·
Right... I'm nearly up to speed with my build thread ramblings being almost up to date. I've had to drink quite a few beers to get this far so I hope you are all appreciative :).

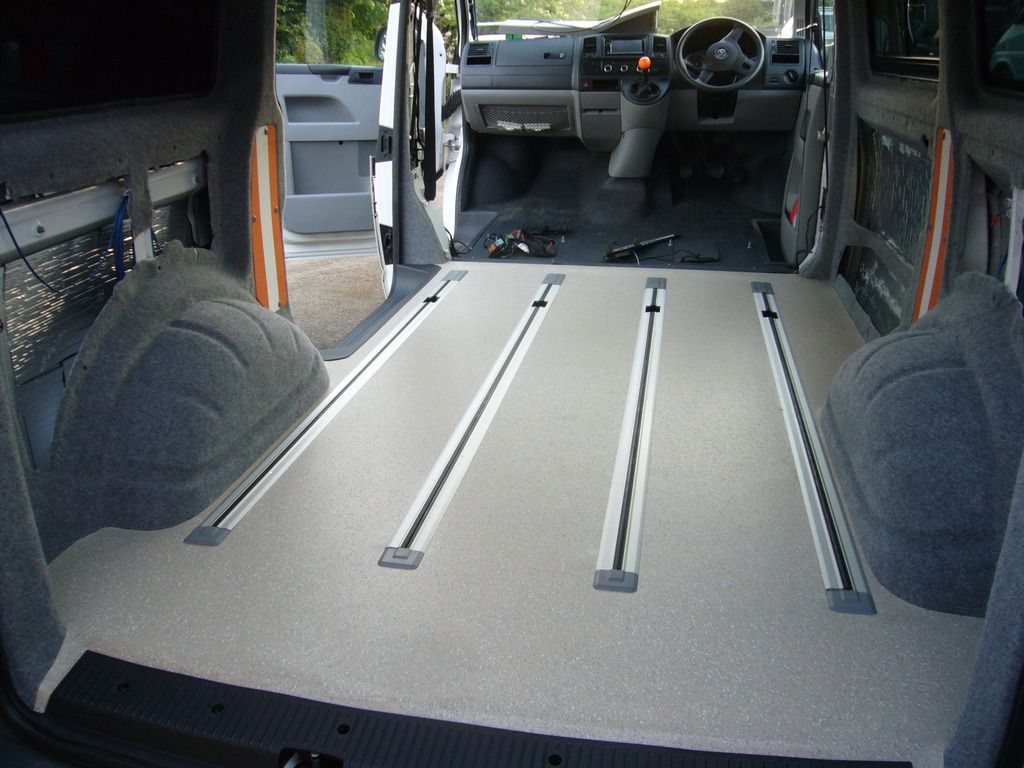
Having seats and windows the next thing required is a floor. Not so easy as those rails are both awkward to scribe around, have a fairly tight tolerance height wise and the cut outs remove most of the plywoods structural rigidity and weight that holds it all in place. Still, nothing that standing and staring won't fix. And I did a lot of that. Hmmm'd, ahhh'd and scratched my chin a bit too. In the end decided on the old 9mm battens, 2 x 12mm ply + altro with a bit of 3mm laminate underlay thrown in for good measure. Job not finished yet so may freestyle with a bit of celotex depending on how the mood takes me. The most annoying thing is the change in height of the floor ribs close to the sides and they also seem to be lower towards the rear threshold. Think there will be some fudging with the 3mm insulation to get everything level.

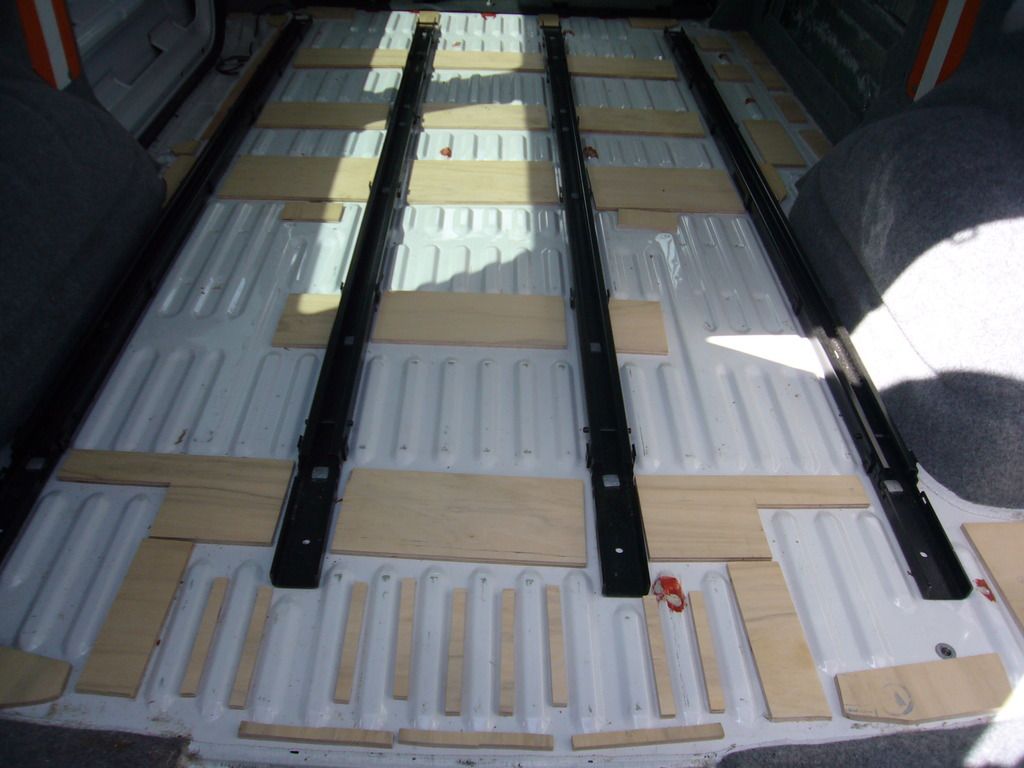
First off the 9mm battens. Maybe went a bit over the top here but given the points above wanted as solid and as even a support as possible. Used some 6mm ply sanded down a touch on top of the rib at the sliding door. This will hopefully provide support where it is needed. Used marine ply for this bit and out of interest plopped a cut-off in a glass of water. Been there a week now and it is just the same as when it went in. Should cope with a splosh of spilled orange juice then.

Photo before cleaning and sikaflexing..
 
#22 ·
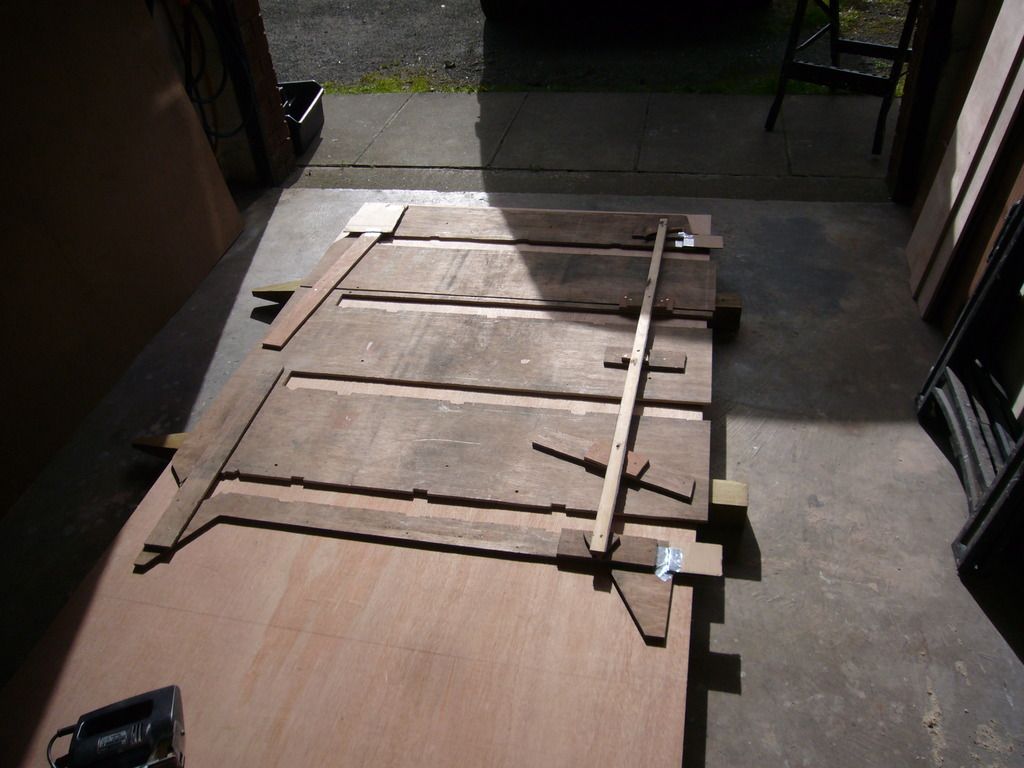
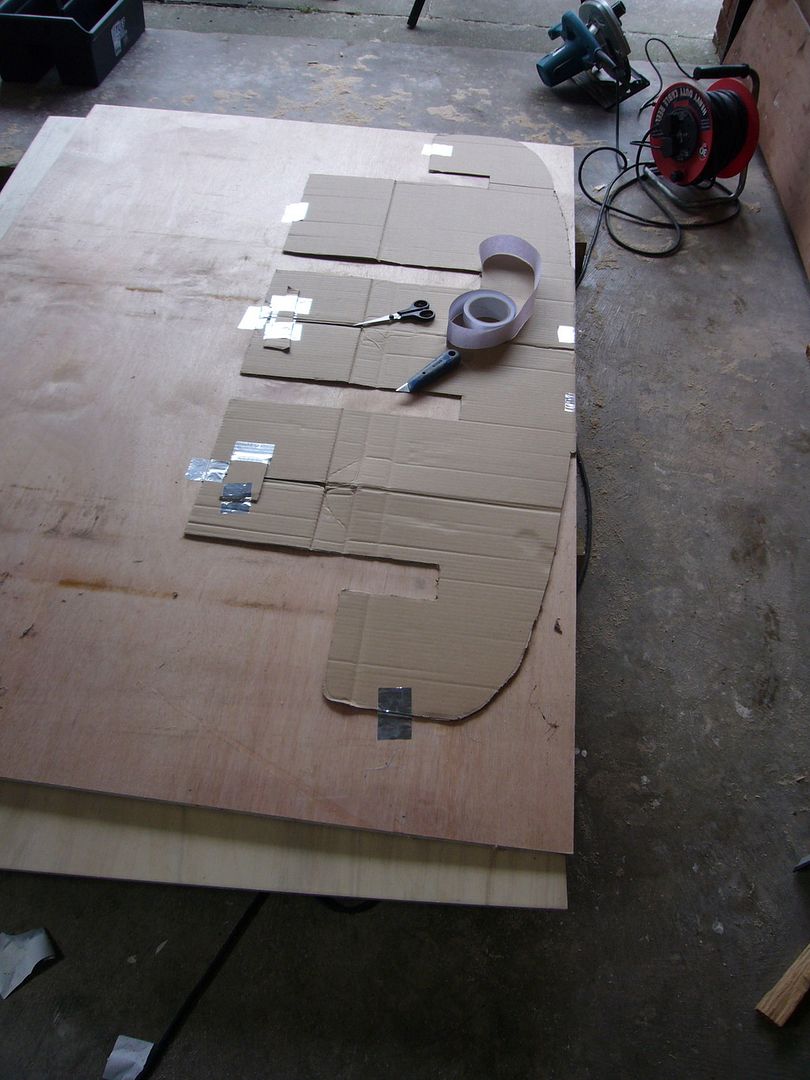
Not much to say about the next bit. Luckily had the old ply floor so butchered that to make a template for the front half and used a bit of cardboard to make a template for the rear. Now have a two piece subfloor and will in turn use this as a template for the layer above. Got a sheet of 10x5 for that. If my carpentry is worth anything then I should be able to use that as a template for the altro. Not looking forward to lifting it in and out though. Fingers crossed.


#25 ·
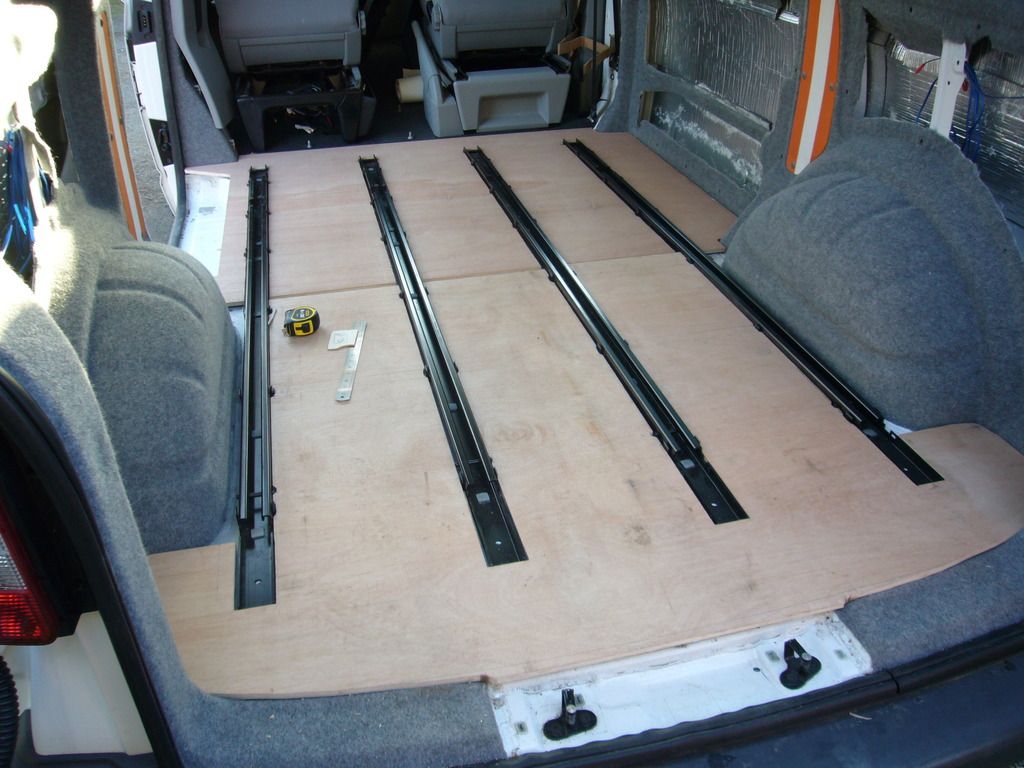
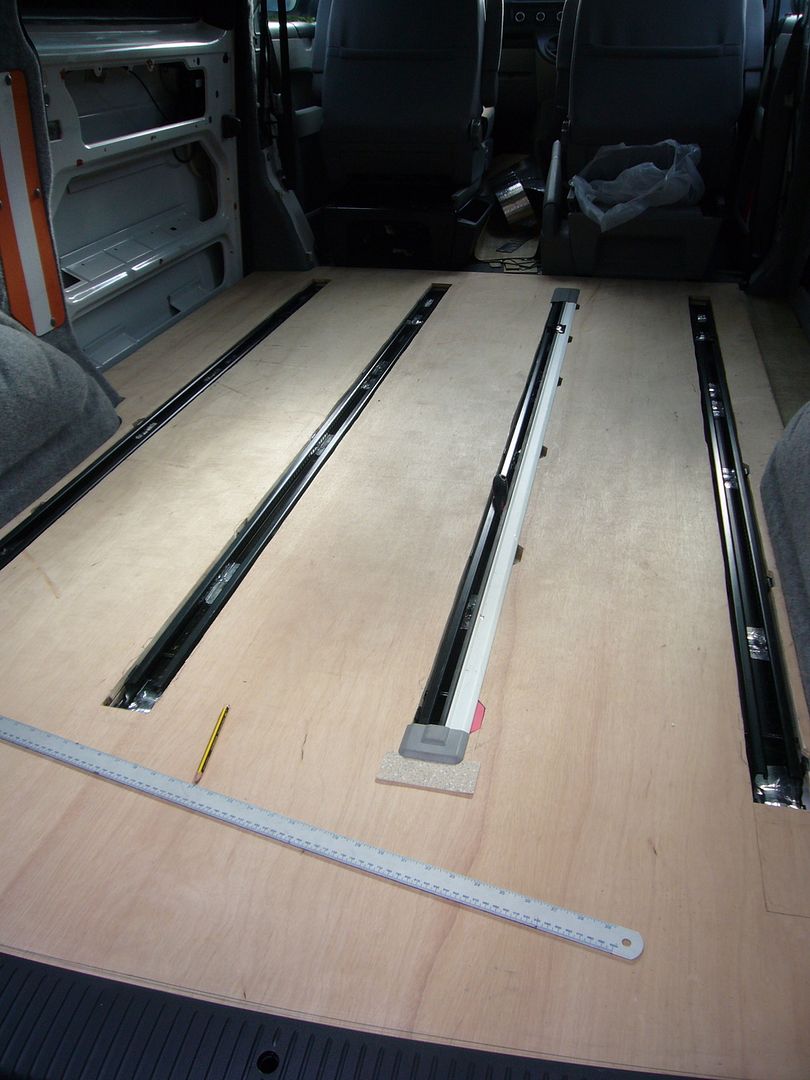
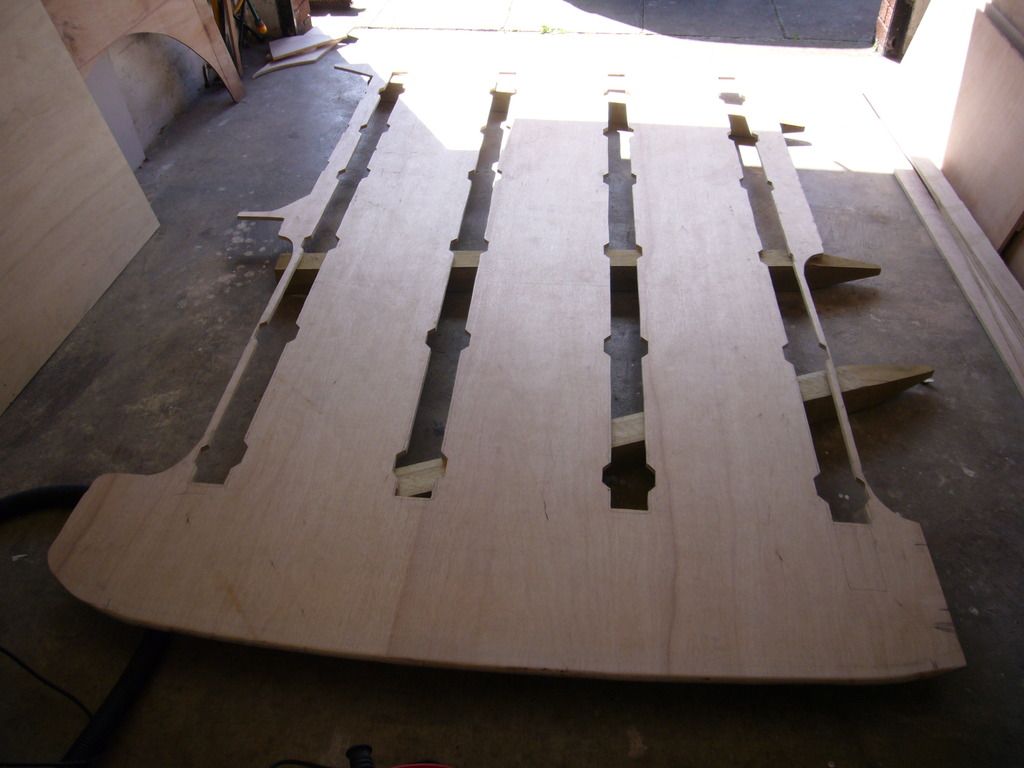
Well its been a couple of weeks in the making but finally here is the one (+2) piece floor. Not quite one piece as even a 10x5 needs a couple of extra inches fore and aft of the offside wheelarch. Was in and out like a tinkers tea bag getting it all measured and tested but was worth it in the end. Filled the cut outs with celotex so that I can get to the catches and remove the rails if ever necessary. Tried to get 12mm EVA foam for that but failed miserably. The 3mm underlay provides a little bit of give in the floor too and the altro sits quite snugly underneath the rails. Is snugly a word? Also had to route out some channels on the underside as my seat rails extend further than the end cap and come up proud of the sub-floor.

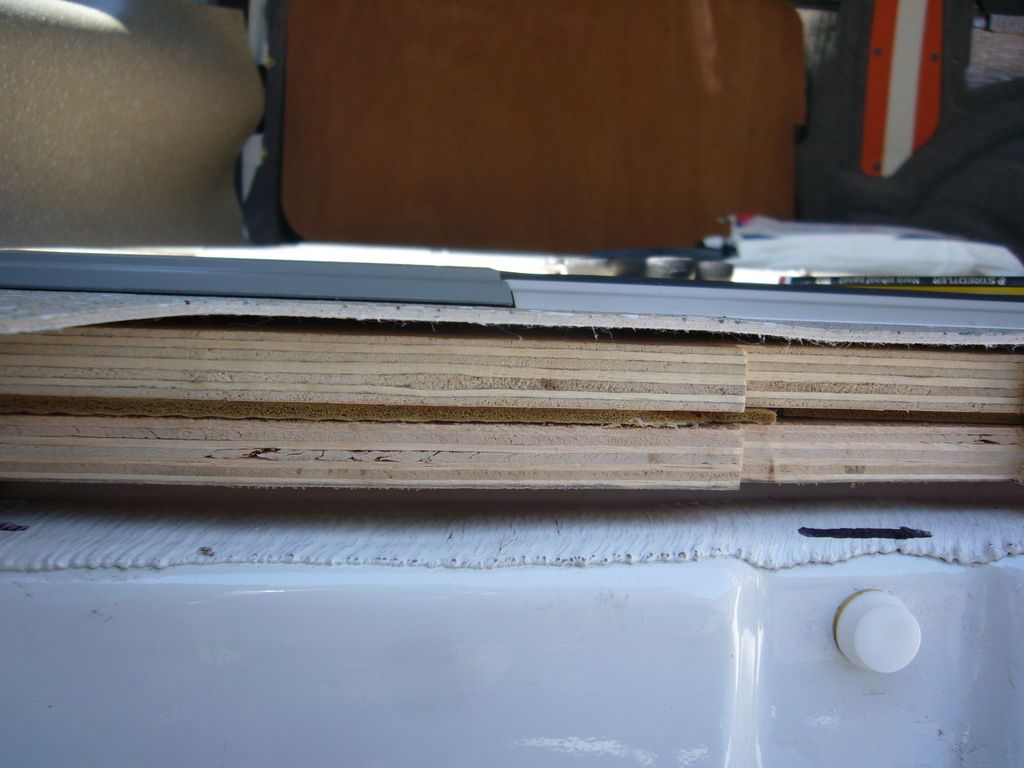
Anyway here is my sandwich:
9mm battens with 3mm foil backed laminate underlay (B&Q) on top of the ribs and in-between the battens.
2 piece 12mm ply sub-floor (with a few screws into battens below)
3mm underlay
12mm ply one (three) piece floor (with a few screws into the sub-floor - especially around the joins of the extra pieces.


Some final checks:


And here is the floor all cut and ready to go:
 
#26 ·
Fitting altro, now thats a beach of a job. All those bloody little bits of grit and sand. Used the cut out floor as a template and cut the perimeter a few centimeters wide but took a deep breath and cut the rail slots full size. Figured it would be easier than shaving little bits off and thankfully it payed off. Trimming around the edge took a lot of patience and a lot of time. Central Scotland was blessed with 22 degrees today which made the job a whole lot easier as the vinyl was nice and pliable. Unlike when I did the carpet lining and it was frozen solid :(. So here is the almost finished article. Just one little boob to fix in that the drivers seatbelt bolt is now inaccessible :eek: so need to trim a little floor away and secure the front edge. Got some beading to go around the edge but I think I might get away without it. Do worry a bit about spillages making their way under the floor but think mastic pressed against the carpet lining looks a bit naff. Anyway, the boss said just leave it as it is so who am I to argue?

Happy days:
 
#28 · (Edited)
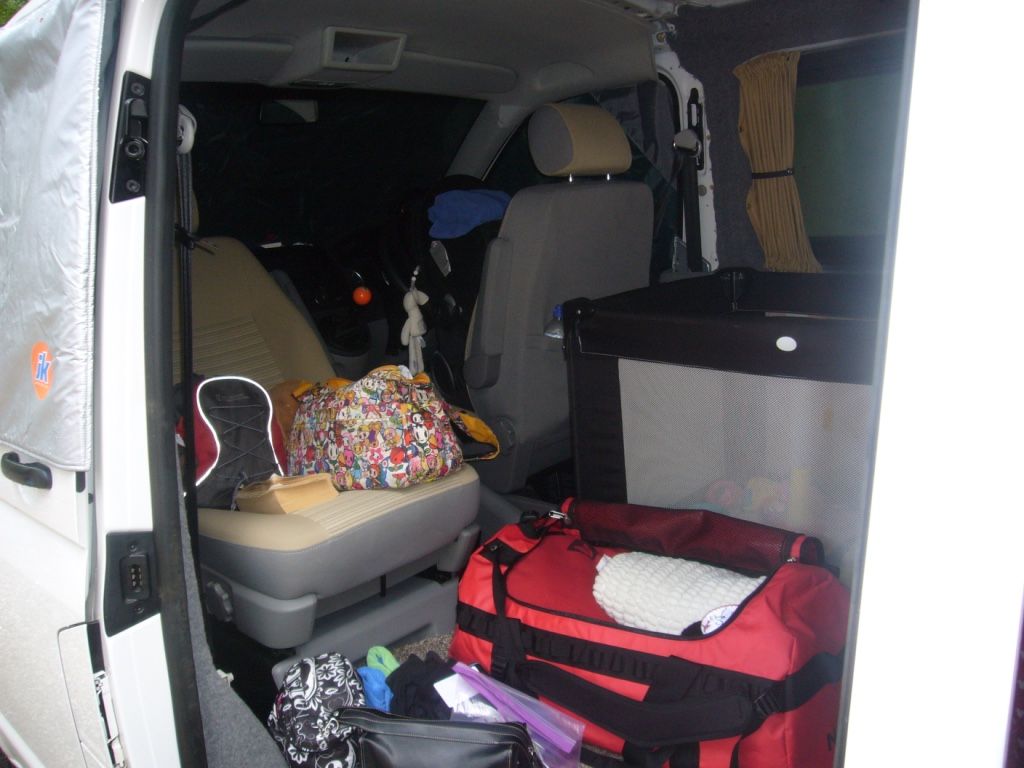
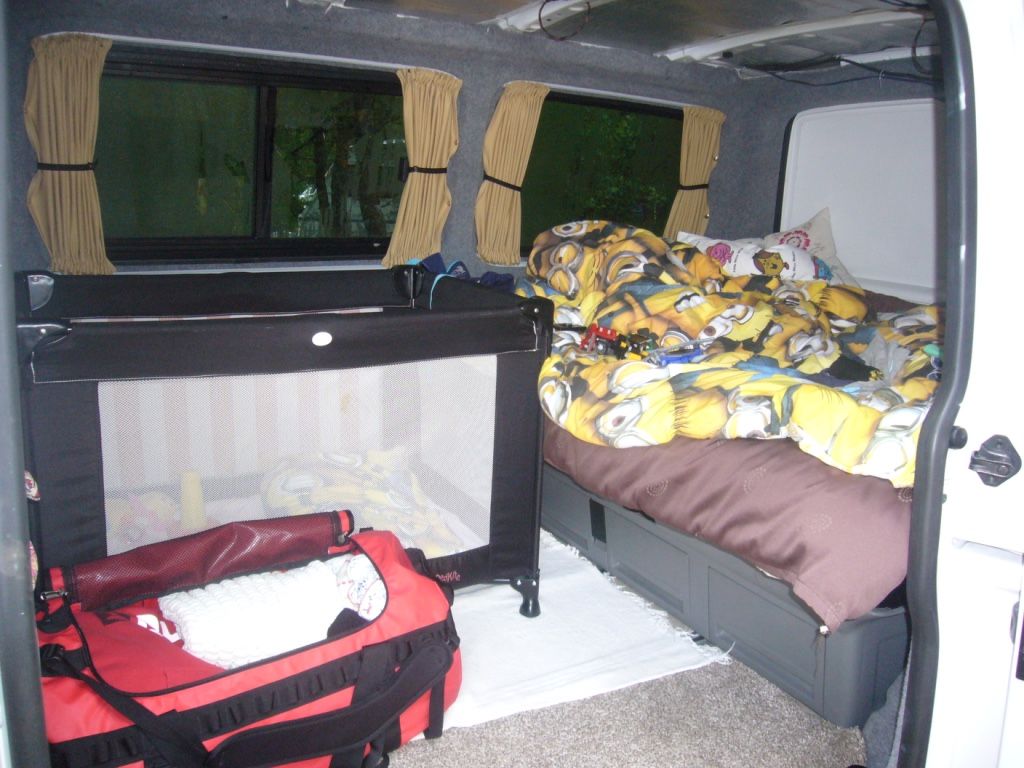
Goodness me, 4 months since I put the floor in! Not done much more to the van since then but just got the flooring and seating finished before the first family camping trip (ie. 12am the night before!). Love the caravelle seating. It is so adaptable and having three kids it really makes the best use of the van for school runs, days out and longer trips. The California front swivels are ultra comfy too.


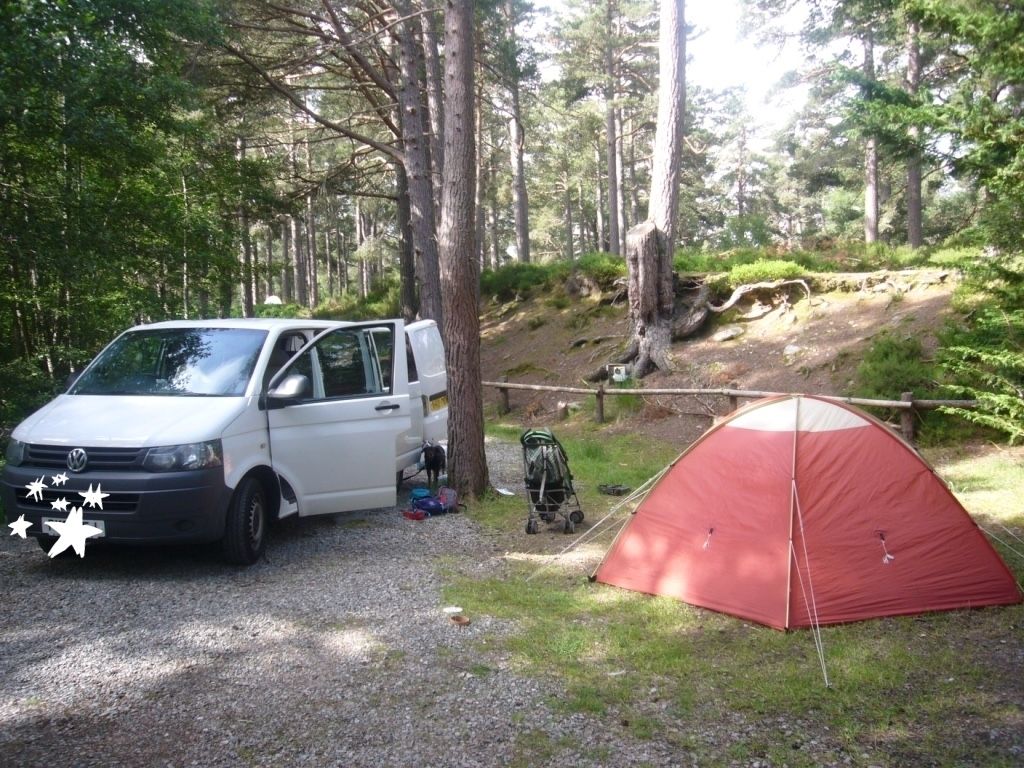
The first trip was up to Aviemore. Brilliant weather, beautiful scenery, canoeing, kayaking, walking, real ale-ing, marsh mallows roasted on propane (Heston Blumenthal eat your heart out) and not a midge in sight....


Looks cosy doesn't it....


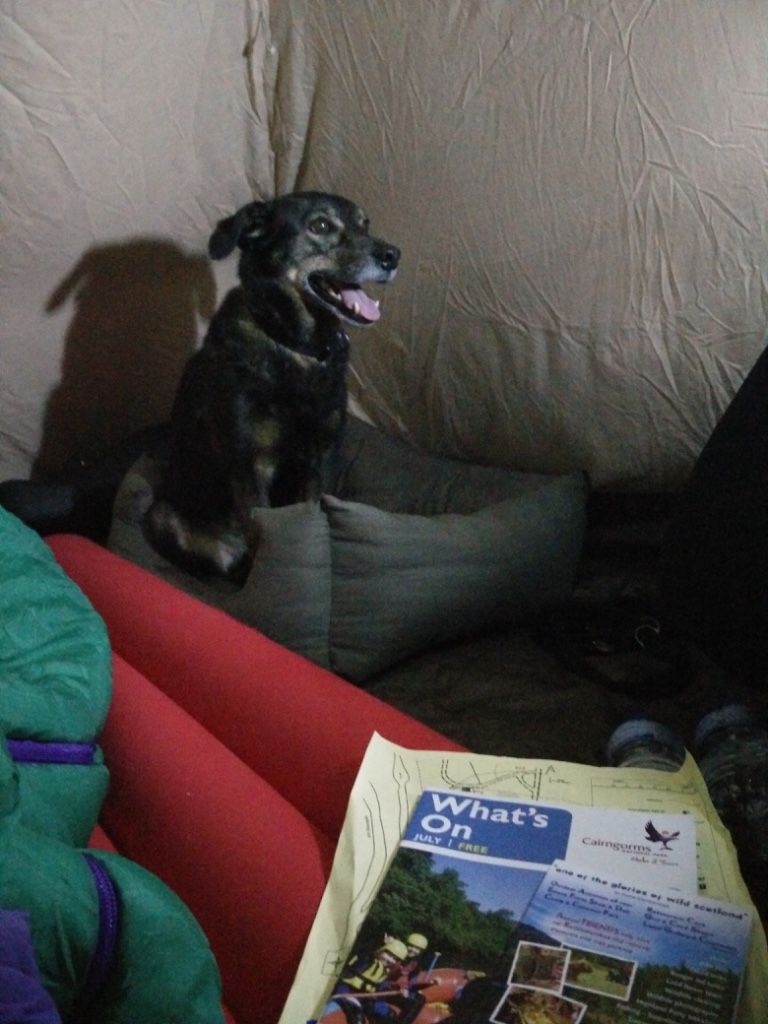
So how come the guy that spent his evenings and weekends working on the van is relegated to share with the dog in a 25 year old fusty tent that he used to sleep in as a kid and has a ground sheet like a sponge?


Still, man's best friend was well chuffed and I probably got a better nights sleep than I would have in a tin can with a wife, 2 toddlers and a baby. Especially as I know how well they chuff. Now all I need is a better tent......