VW T4 Forum - VW T5 Forum banner

A camper build beside the sea

15K views 29 replies 12 participants last post by  danpayneuk  
#1 ·
Hi guys.

I thought it was about time I posted some pics of our van and its one step forward, 5 back type buid:(

Alot of you guys have been loads of help so far. Its much appreciated.

Im sure I will have plenty more questions to come over the next year or so.

As for the van, it lived its life up in the North East of England until myself and a couple of friends went on a surf trip up there and I cam back with it.

Work started in less than 24 hours of getting it home. My wife wasnt amused as she hadnt even been in it.

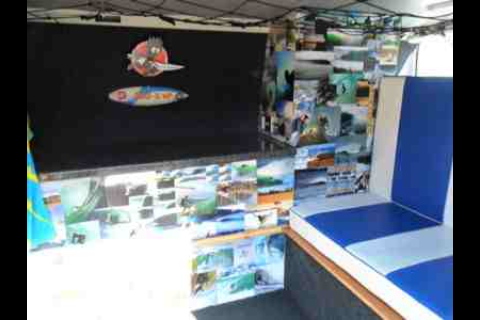
The previous owner had already done the conversion you can see but it wasnt great so we had decided to eventually replace it.

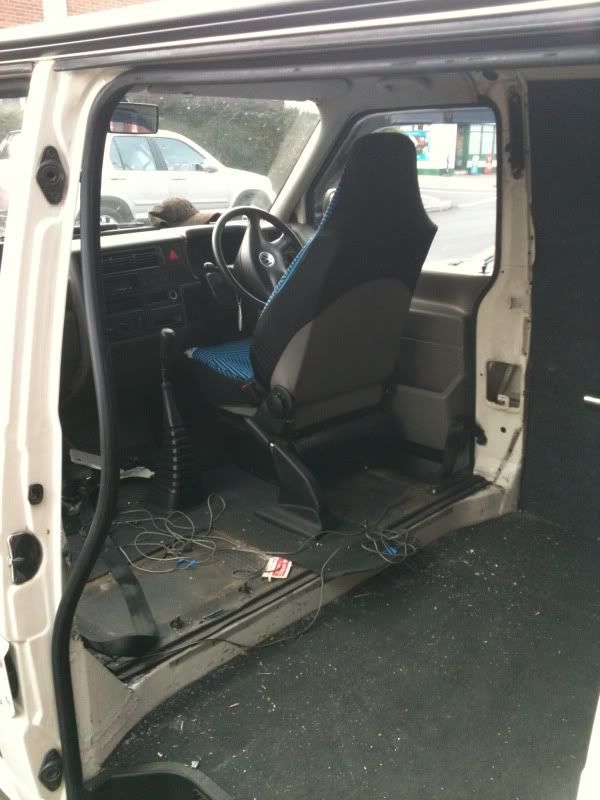
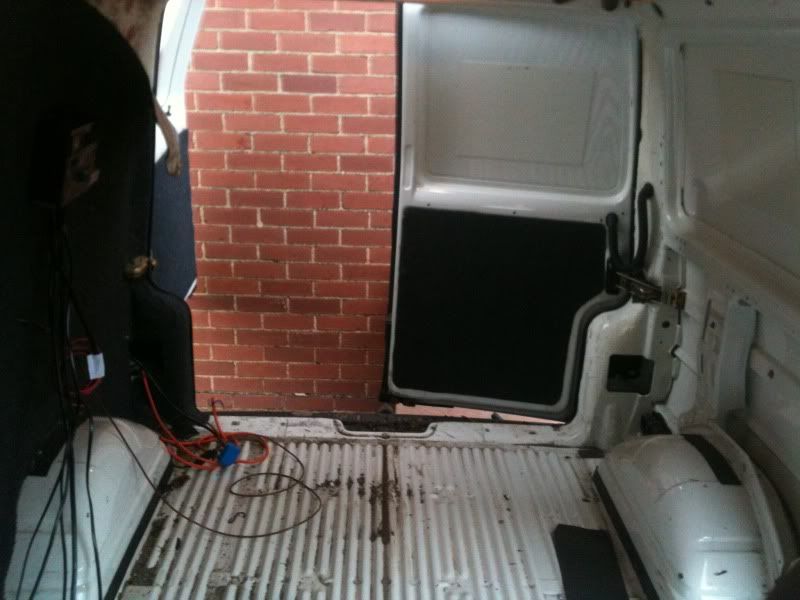
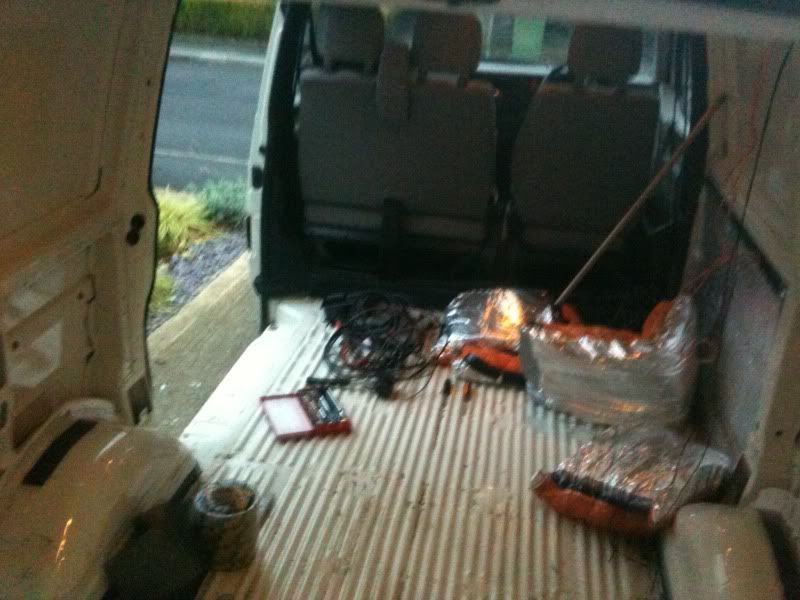
These are a a couple of pics of when I picked the van up and what it looked like.

Image


I have no idea why this bloody picture will not rotate. It has in the album on photobucket but the link still show it this way.
Image


And now the work that has been started. There isnt alot so dont get too excited.

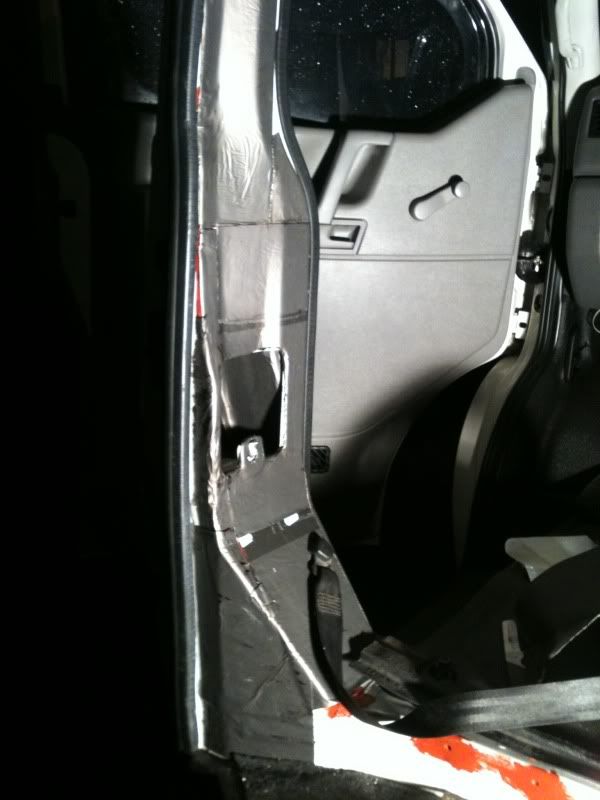
1st job was to remove the full bulkhead. Wasnt the easiest of jobs as most of you will already know.

Image


Then flashband everything

Image


When we took the van down to the garage to start removing the bulkhead we noticed it had a flat tyre. Turned out the rim was cracked. Far from happy after the amount of miles I drove home on it. After a couple of phone calls it was all sorted so its all fine now.

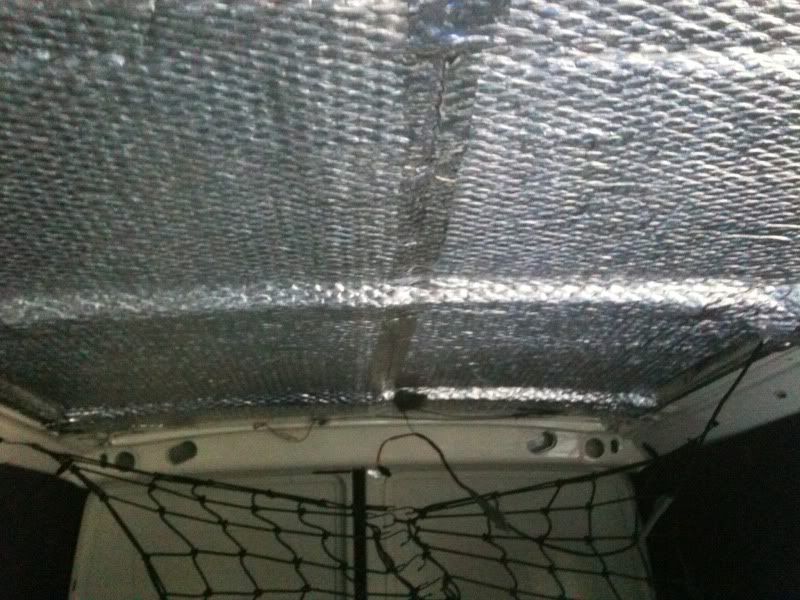
I wasnt planning on re-insulating the van but after reading on heare and seeing what was done I decided to redo it all. Good job as the roof was starting to show signs of slight corrosion where condinsation was trapped between the insulation on roof panel.

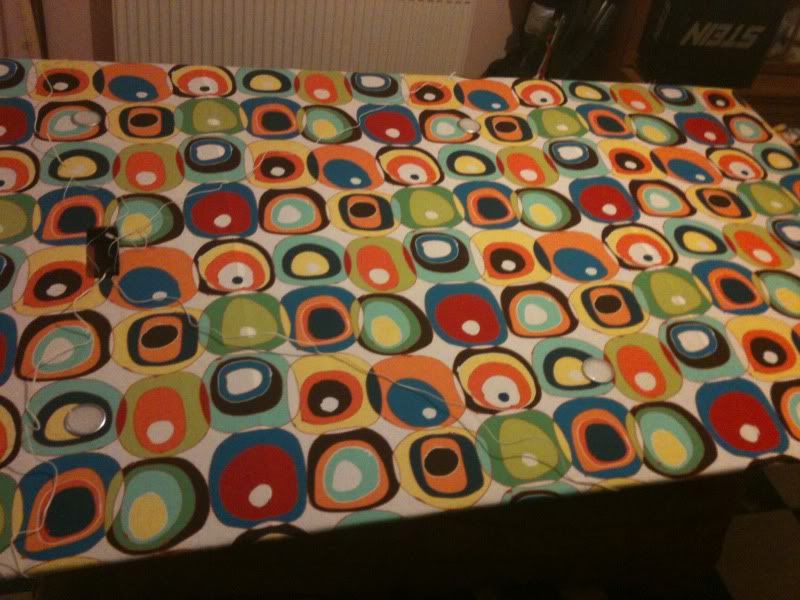
After getting it treated and sorted the usual flashband and then a couple of layer of thermal bubble were added, followed by a new ply rough covered in some nice funky material.

Image


Image


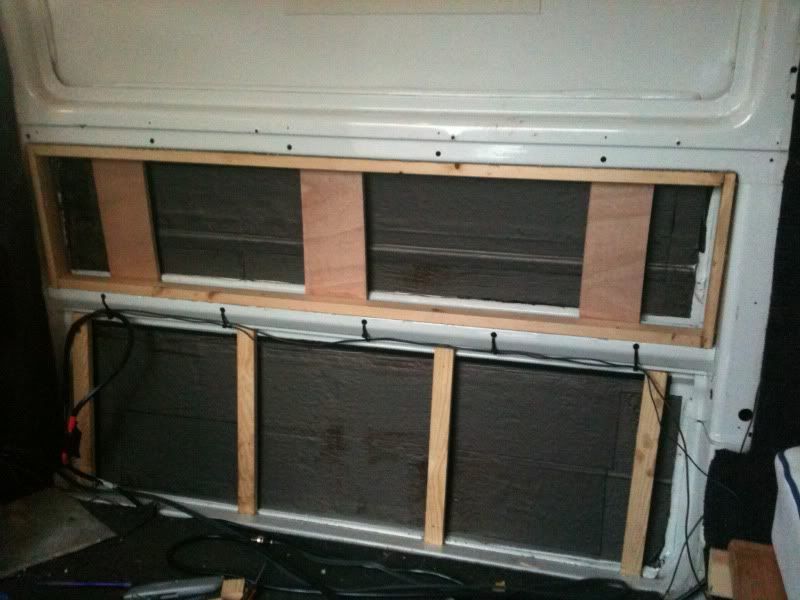
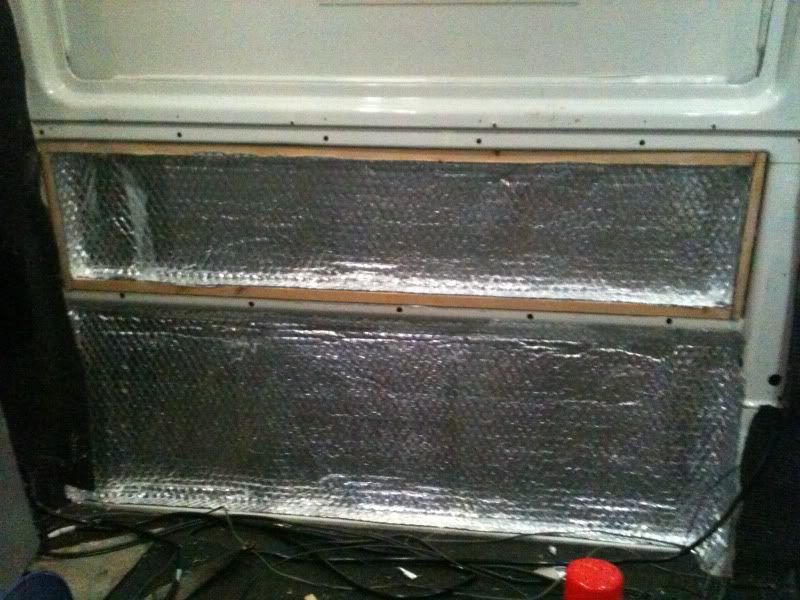
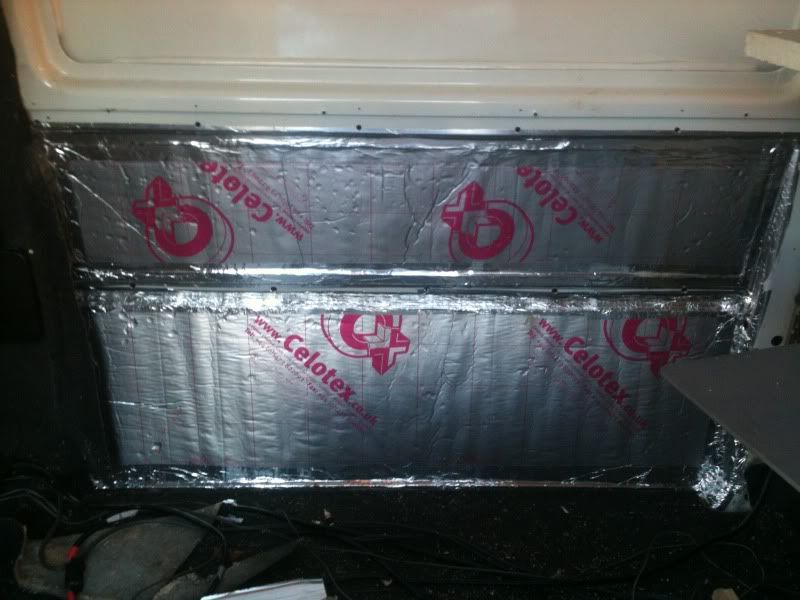
Next was to start the insulation on the sides. I did this slightly different to what most do with the bubble and celotex route.

I have built a frame up so that the insulation doesnt touch the interior face of the panels. Hopefully meaning there is an air gap which will aid insualtion and stop condensation build up. Whether it works only time will tell.

All the panels were treated to more flashband too. Everything else is the same. layer of thermal bubble. All tapped (Alui tape), celotex (only 25mm all round though), all tapped, another layer of bubble and then tapped again to seal it all.

Image


Image


Image


Floor was next. Again I wasnt planning on ripping it up, but I thought I may aswell as it would make running all the electrics much easier so this is where we are now.

Just laying all the wires. Unfortuneatly funds have dried up untill pay day at the end of the month so will have to wait to finish the rest of the wiring before I can put the flooring bcak down.

Image


Image


There are still a couple of jobs I can still do though. So enough to keep me busy.

As I said its been a bit of a backwards build so far, which we werent expecting, but I like things done right so it seemed to be the only way.

Will update in the next few weeks once the next stage is complete.:):)
 
#3 ·
Hello, ive seen this van about where are you in devon?. Your doing it the right way ripping it all out and starting again, i was suprised how much we spent on wiring when we did ours, looks like youve got a good base to start with, good luck and looking forward to seeing more pictures as funds allow.:)
 
#5 ·
Cheers for the comments everyone.

Actually not got thought that much flashband. Only 4 or 5 rolls I think. One more should finish it off. Lol famous last words.

Ann we are from dawlish so you may of seen it around the area there. We are usually out and about in it all over Devon though either surfing, riding or just taking the little lad and the dogs a walk.
 
#6 ·
Update at last.

Been a while since I posted an update, so thought with the exterior pretty much sorted, thought I would treat you guys to some pics:D

Had a few issues along the way, which is pretty much standard for any camper I imagine, but most sorted now.

Last was knocking from the rear suspension. I thought it was bushings, so after swapping out this and that all it turned out to be was the new eibach springs knocking!!!

Everyone told me are you sure the springs werent at fault. I was convinced they weren't. So a big thank you and sorry for not listening.:eek:

All that was happening was when the springs had settled, the coil after the locating pigtail coil was knocking against the mounting plate at the top. So all was needed was to put the rubber plates in that came with them. I modded them a bit to help the van sit a little lower still.

THe van now has new sachs hd touring shocks on the rear to go with the eibach springs. Feels so much nicer to drive.

Interior wise we have got the carcasses of the cupboards in and work surfaces. Just need doors and other bits to finish it off and the smev hob grill.

ALso got a rnr bed from mark at autobeds. Still need to sort the cushions for it. As we wanted to go away to scotland and couldnt afford the smartbed evolution bed we wanted, we went for the next best thing. Mark was really easy to deal with and provided a great bed for us. Luckily I kept the cushions from the bed that came with the van. They were ideal for a bodge job while away.

So plenty of work to do interior wise still. Thats 2013's list of jobs to complete.

Here are some pics.

Part way through carpeting
Image


Just after the windows were fitted. Note to who ever reads this. DO NOT use phoenix windows!!!!!!
Image


Image


Weekend away camping with a few friends.

Image


The group is slowly growing. Have 2 t5's and 3 t4's now. WIll have to get a pic up when we are all together.T:

A couple of pics from the road trip around scotland.

Image

Image


Now the latest mods.

The LR mondial rims that I bought off Pezza months ago, which also made Chezzy get his act together and get his fitted before me.;)

Had them and the roof sprayed bottecelli blue. Its the really light blue that the citreons, pugs etc are at the moment. Wanted to keep the colour change subtle.

Doubt it will be to everyones taste but I like it and that the main thing.

As for getting the wheels to fit. Had some adaptors made up. 20mm at the back and 17mm at the front. Could of gone wider at the back to be honest, but wanted to play it safe. 235/45's on the rear and 225/40's on the front. WIll eventually change the front tyres, but they were too good to change just yet.

Image

Image


Well thats it for now.

Jobs still to sort.

Fix or replace amp
Get cupboard doors and other bits.
Finish wiring the last couple of sockets.
Some bits from audio sport
Possibly fit a pop top and smart beds evo rnr bed.

Im sure the list will build, but then again we may just by a T5:eek::eek::eek::eek::eek:
 
#7 ·
Hi, speak slowly I'm female ;) This is the look we want to go with on our van, the exact alloys we want, have been struggling with the adapter issue, you say you had yours made up, can you buy them standard, or who do you go to to get them made up? Was it expensive? Any change of studs/bolts, or does that come with the adapters? What's the ride like with these? Sorry for all the questions, any help appreciated!!!T:
 
#10 ·
The wheels are off a land rover, which has a different pcd (pitch circle diameter) to a t4. Basically the studs/ wheel nuts have a different spacing so they won't fit straight on.

A set of custom adaptors will need to be made. The adaptors bolt to the van and then the wheels are fitted to the adaptors.

As the adaptors are custom they won't be the cheapest. Colse on here apparently can get them made, if not chezzy has the details of the chap who made his. He was the first chap to fit them tona t4 and was a great help when I got mineT:

Have a search through the t4 wheel page for his thread. His. Old t4 was a long nose so will give u an idea what yours will look like.

Hope that's some help.

If u want anymore info just ask away:)
 
#14 ·
well a quick update. No photos yet though sorry.

Van is currently sat on the ramps while I change the crank seal. I changed the cam belt etc the other month. My mate who used to be a mechanic said don't worry about changing it. Its a pig to do. Well somehow we must of disturbed it as it started leaking latterly days after getting it all back together.

As you can imagine I wasn't a happy bunny.

The exhaust has also seen better days so ripped that off tonight. I have spoken to pp tuning and cybox about exhausts. I was hoping I could just get away with a new dummy cat pipe for now but doesn't look like that will be the case, so will be ordering up a new full exhaust sometime in the next week too.

Any advice on which you guys prefer?

And last but not least. The camper conversion we were getting ready to finish, has now been sold to a member on here, sailcurt007. I hope your happy with it dude and have it fitted now.

Now having 4 of us and only 3 seats we needed to do something. So it was decided after numerous changes, to fit a t5 caravelle seat and floor rails.

Hopefully this will give us everything we want and make the van much more useable as a surf/mtb/camper/day van/ what ever else we use it for lol.

The old conventional set up just didn't work for us.

So the seat and rails are on order and should be here next week. As I am now completely skint or soon to be in the next week, so I am going to have to retro fit these myself. Not too much of a biggy. Im more than capable of doing it and quite looking forward to it.

Saying that, its going to be interesting. Read loads on here about how they are fitted into T5's and also the few threads from the guys who have fitted them to t4's. I have an idea in my head what I need to do, but until it turn ups and I can see exactly where everything sits etc, its all guess work up until then.

The fixings plates/spreader plates are my main concern at the moment. As not sure exactly what will be needed. Be it T5 oem plates or custom ones.

Hopefully going to head up to mattsthat soon to have a look under his as he is fairly local to meT: Will give you a bell soon dude if you see this if its still ok:)

The end results is a stripped van sat on ramps in pieces at the moments. Always good to see progress:D:D:D:D

Im sure it will all be worthwhile. Well thats what I tell myself anyway.
 
#15 ·
So here is the progress we have made.


As you can see we have gone for the new stripped now pokey look. I was told it was this seasons new look:*:*

Well actually the front end is now back together after another ball ache of stripping the cam belt to replace the crank oil seal. Eventually got it all back together and not leaking.

Word of caution. When installing the new seal without the special vw tool. Wrap a single layer of electrical tape around shaft to cover the keyway. The first one I changed got caught and buggered the seal. Didn't know until all back together and ended up with a bigger oil leak than started with. Lesson learntT:

Also quite excited. The new exhaust and T5 caravelle and rails should both be turning up tomorrow. Also just went and won a complete RX8 interior on ebay for 50 quid so thats the front seats sorted too.

Image


Wel as long as the guy will actually sell them and not back out. Fingers crossed. Hoping they will be quite a good match to the startling t5 seat.

Image


Not an exact match but will see how good or bad it looks when together. Closer than the standard seats anyway. So hopefully will have a drivers single and passenger double for sale soon.

Going to be a busy few weeks I reckon.

List of things to get for the new lay out now:

2 x fasp swivels.
New altro flooring
Finish custom sub enclosure
Buy passenger door pocket
Build speaker door pods into pockets
Rear speaker pod.
Swap leisure battery for smaller one so can be fitted under bonnet.
New split charge system and simplified wiring
Customize interior panels to add more storage
style line b pillar kit
pp1 injectors
remap
Tidy up of some bodywork.

Oh the dam list goes on. DOnt think I will be quoting the day job just yet:eek::eek:
 
#16 ·
Well todays shenanigans were to start fitting the rear t5 rails.

I have been thinking for ages how I might do this. A few have already done it, but unfortunately never showed detailed pictures of how and where they were fixed too.

Pretty much all my ideas of massive spreader plates have gone out the window. Im not sure how many cross members most t4's have, but mine has 5.

As the rails I have got have either 6 or 7 fixings I plan to line up what I can and then re-drill rails to line up with the other cross members.

I know I will need to make one spreader plate at least, but this is right at the front of the rails, so don't have to go silly which i planned to to at the rear if one was required. I mean a full width chassis to chassis spreader plate.

There will be a few custom L shaped brackets to make aswell, but nothing difficult. These will be attached to the chassis swell as there are holes already in place.

At the moment there is only one bolt I am unsure how I am going to get a fixing. But then I haven't really looked into it much yet.


So fitting

As for positioning I managed to get the rear hole in the rails to line up with the vans rear crossmember, which sits above the spare wheel. This was where I started. Next I lined up the front. The second hole back from the front on the rails also lined up just with the first van cross member.

The distance between the rails should be 380mm centre to centre. So its a case of lots of measuring, then measure some more. And if you really want too, measure again. All before drilling T:

Pilot holes were drilled and then re measured to to make sure all was still fine, before opening the holes up larger. At the moment I have only gone up to 10mm but will open up a little more just to give a little but of adjustment.

Annoyingly I drilled one hole slightly out of position, which hopefully will be fine once opened up to 12 or 13mm. Reason being that at the front fixing I used it sits just on the side of one of the raised dimples. When I must centred punched it I must of slightly over compensated:*


So thats it for now.

Here are a few quick pics of the progress, just in case anyone else ever decides to do it they may find them useful.T:

Rails in there position.


View from sliding door.


Below the van, showing the cross members. Doesn't really show anything else. At the moment there are just nuts and washers holding rails in place while everything was lined up. Need to make the spreader plates to sit in the cross members and any other custom ones required.


And a few just showing the seat being trialed for position. All worked great :):)


One word of caution. These seats are bloody heavy. You will need at least one other set of hands to help manoeuvre it, so make sure you have a mate around who isn't a complete weed. The wife/girlfriend will not do, unless she is a Russian shot putter!!!

This weeks jobs will be mainly making new fixing holes in the rails, which line up with the vans cross members. Finish drilling the holes in the floor, Making some spreader plates and other fixings.

Once the exhaust turns up that will be fitted after the seat is all securely finished.

As work carries on with the seat I will keep adding some more pics.
 
#17 ·
Long day working on the van today.

All worth it though as the rails are now fitted. :)

Will get some pictures tomorrow of the last bits of the installation.

Got a few little bits to finish off. Torque the bolts up, bolt a couple of bracket to chassis and weld up the holes from the old rnr bed.

Then off to get some batterns and celotex to sort the floor and raise it to the level required.

Really happy wig today work. Looking forward to having the van back on the road tomorrow.
 
#20 ·
Cheers dude. The seat is really comfy. Had a few issues with the rails yesterday, but should be all sorted now.

Will aim to get some pics up some time this week. Trying to get all the floor finished by Friday as need to take the van away at the weekend.

Jason yes will try to remember to drop you a pm when I do :)
 
#21 ·
Abit of a delayed follow up to the seat fitting. As a few other members are aware. I wanted to make sure that all was fitted properly and securely. So here are a few pics of the spreader plates that sit under the van. All were made from 6mm steel. I think the l bracket were 3 or 4mm.

They were all painted with silver hamerite, thats all I had to hand unfortunately. :( Nevermind. All will get a new covering of wax oil to help protect everything.


This is one of the centre plates which sit in the cross members. I used one large plate to cover the two centre rails, and then a single ones on each outer rail.


The outer rail plates. Slightly bigger and beefier than standard t4 seat fixings, along side the t5 nuts. The plate still needed deburring at this stage.


This one shows another view of the centre plate securing the the middle rails and also a spreader plate for one area at the front where there was no cross member. I still went for a large plate to spread the weight as much as I could, sitting on the lip of each chassis rails.


This is the rear brackets, which have also been bolted to the chassis. These are the outer outer ones at the back. The middle ones again are like the previous ones as shown in the above pics.

All in all the job its self is pretty simple, but time consuming if you have never done it before, due to measuring, marking, measuring again and again. Plus if you decide to make your own plates this can take a while. I didn't really know what to expect before hand so had to wait and see what was what once all was lined up in the van.

I more than happy that the seat is secured safely. At the end of the day I have attached through all the cross members (5 in total plus the front with large spreader plate). So 6 positions in each rail. This is where original t4 seats would attach too and you could potentially have two rows of seats attached to these (5-6 passengers). Here you have just three spread across all for rails and 6 bolts in each.

The one thing I will say is I must have the newer rails as I have read that the older rails have about 9-10 holes in each rail. Im guessing from the pictures this was to allow two angled brackets to sit around the t5 cross members. Im not sure though. I didn't have them so can't be sure.

Please remember though, this is how I felt I could provide safe and secure fixings in my van. Yours maybe different or you may feel you can do it another way better. This is just to hopefully give some idea of how it can be done and maybe of some use to some of you guys. Im definitely not saying its the right way and only way it should be done. I do however feel its safe and that was the main priority was, as I have the two kids to think about.

Anyway next up was the start of the floor inside. I need to get this in temporarily for this week just gone as we were going away and needed to take the van.


Start of all the batterns being laid and a quick check on how the sub enclosure will fit. In between the batterns I put 25mm celotex and then covered with the 9mm ply flooring I had.

None of this has been secured down or finished yet. I am just re-wiring the van so decided to leave it all loose while I decide on all the cable routing. Once that all in place I will start to secure the batters and flooring down and get the altro flooring laid.

I have some more pics on my phone. I will get them up during the week.:)

Hopefully though that should help anyone doing the seat conversion a little.
 
#24 ·
A quick update of the van this week. Most probably a little boring for most that now the seat is all fixed in, but hey :D

The wooden frame and celotex all positioned and cut, ready to be secured down.


The ply floor in and re-cut for the rails. It ss pretty dirty and needs the old glue removing still. Its was only in temporarily while we were away.


As I wasn't able to get down the workshop to remove the seat to finish off the floor and fit altro, I thought I may as well start on the re-wire for the new lay out. So ordered 30m of twin cable, then ordered another 30 m as realised I was being rather tight on the amount of cable I actually needed. oops. Oh well. Not to self. double check amount before ordering and save on doubling the postage costs:eek::eek:

So out came the interior again.


Off came all the panels, and carpet pulled back where needed.


Dash stripped to allow access and new cables run. Just need to poke these through to the new fuse box when I get it.


Amp all wired up and ready to go once sub enclosure built.


I wanted to bolt it to the van as Im going to reshape the side panels to fit over it and hopefully make a stealth panel to hide it. Thats the plan any way.

So now all the wires are run I can get back to finishing the flooring off in the back and finally get the rear seat completely finished.

The list of things is growing and the shopping list has increased dramatically too. Not fond of that last bit as that mean means more money to spend. Spent way too much recently!!!
 
#25 ·
Got the front seats in at last. Not on swivels yet and need the the bases etc tidied & covered. Thought I would just get them in for now.


Need to make some or get hold of some cover to tidy up the inner edge of the seats as Im not happy seeing all the metal work etc down the inner edge.

Other than that they are awesome and match the rear seat really well.

As for the rear. I have decided to rip out the newly fitted altro and fit some of the thinner stuff I used to have from mega van mats. This new stuff is to thick for the rail covers, plus the finish is no where near as nice.

Took a gamble, but didn't work out. Nevermind. Just hope this ones comes off easier than the last:eek::eek:

But for now its time to leave it for the rat of the summer and save some pennies. To many hobbies eating a big hole in my pocket.
 
#26 ·
Well not much has changed since the last update. I decided as i seem to be spending a shed load of money on new dive gear and a holiday I may aswell carry on and spend some on the van. The credit card is melting at the moment!!!!!!!!!!!!!

So after another call to Upsex, I am now waiting for a new split charge system, fuse box and some other wiring to allow me to finish off the alterations to the electrical system.

The leisure battery is now sat in the engine bay along side a new starter battery. I had to replace the starter battery as the one I had was too big to allow both to fit. Got a varta E11 as the size is much better and still have my 110ah leisure battery :)

I will get a few pics as at the moment they are just sat in there. Still need to finish the the wiring.

Altering the ECU and fuse box want really that big of a job. More complicated trying to get your head around what to do with all the bloody wires that seem to spring up from everywhere once you have them both stripped down and waiting to be repositioned!!

Nearly there though so hopefully all works when everything is reconneted. Will mean I will have the interior lights back again, and hopefully no more flat starter battery by leaving the wrong lights on.
 
#28 ·
The leisure battery do you mean?

If so, I have had to replace the existing negative starter cable. As my starter battery sits closest to the wing and I want it to earth out on the original point in the engine bay it is a fair bit longer.

Got to pick up a parcel Tommorrow from the post office which I'm hoping is all the electrical bits.
If it is then I will finish it all off over the weekend. Will try get some pics too.
 
#30 ·
Ah right. At the mo I still have the altro floor down. With the rail covers on it does look really tidy. Like what wicked vanz posted on the original post you looked at.

Once I raise the rails slightly I will get it all looking good once again.

Got all the electrics in except for the 12v fuse box and wiring to connect it. The split charge stuff was nice and simple and moving everything was fine. Really not a massive job :)